
Piercing, cutting and drilling sheet metal is an integral part of metalsmithing. It may seem daunting at first – something as simple as cutting a hole in metal sheet can seem like a tall order. However, once you get to know the tools (whatever your budget!) and how to use them, you can start cutting a hole in metal quickly and accurately.
In this guide, we’ll show you how to drill through metal using different methods and a variety of tools, ranging from the basic hole punch, right through to the professional pendant motor.
How To Make A Hole In Metal Without A Drill
If you’re just starting out and your budget doesn’t quite stretch to a specialist pendant drill just yet, don’t worry. There are several tools you can pick up to punch holes in your sheet metal.
Alternatively, you might be experimenting with different methods to perfect your metalsmith craft. If you’re wondering how to drill through metal without a drill as a new technique you want to master, read on.
How to punch holes in sheet metal
Wondering how to punch a hole in metal? When you’re working with metal blanks and you need to create a hole to put a jump ring through or for decorative purposes, the one tool you can rely on are some hole punch pliers.

Hole punch pliers are easy to use. They feature a pin at the end of the pliers’ jaws, and when force is applied to them you can punch a clean hole through your sheet metal.
Top tips when punching holes in sheet metal
- To get the most accurate hole punch possible, mark up your sheet metal or pendant blank using a black marker. This will also help you measure accurate spacing between multiple holes if your design requires it.
- Want to ensure accuracy as you use your hole punches for sheet metal? Start by using a centre punch and hammer on a steel block to create a small dent where you’ve previously marked your metal. This will leave you with a guide as to where to position your hole punch.
- Remember to punch the hole on the side of the sheet metal or blank that will face outwards. This will ensure that any sharp edges that are created will not be visible. The hole punches for sheet metal are quite accurate, so you should only need to file any sharp edges before moving onto buffing and polishing your design.
- Having trouble getting rid of tiny burrs on the inner edge of the hole that’s been punched? Using a forward and twisting motion, file the inner edges of the hole using a round needle file.
Cutting a hole in metal using a jeweller’s saw
Another method of cutting a hole in metal sheet is by using your jeweller’s saw. This method is a proven way of piercing your metal to create intricate cut-out patterns in your metal sheet. It may seem complicated to produce cut-out patterns in a ring, for example, but once you’ve got the basics of piercing and sawing perfected the possibilities are endless!
Note: It is not advised to use your jeweller’s saw to create an accurate hole for jump rings. This is best left to hole punches or to pendant drills for a more accurate result.
How to drill through metal
- What cut out pattern are you creating in your sheet metal? The best place to start for an accurate result is with a design laid out on paper. Make sure you’re happy with the design on paper without making any marks on your sheet
- What cut out pattern are you creating in your sheet metal? The best place to start for an accurate result is with a design laid out on paper. Make sure you’re happy with the design on paper without making any marks on your sheet metal.
- Happy with your design? Now you can carefully lay it out on your sheet metal and fix it in place using double sided sticky tape.
- Now take one of your trusty centre hole punches for sheet metal, jobbing hammer, and steel block. Place your sheet metal on your steel block and position your punch at a central point in your cut-out design. Tap your hammer to leave an indentation on the sheet metal.
- Depending on the tools you have, you’ll now need to punch or drill a hole where the indentation has been made to produce an accurate hole in your sheet metal.
- To start sawing your cut-out design, you’ll need to take a saw blade and your saw frame. Place the blade into the end of the saw frame (closest to the handle) and tighten. Feed the other end of the saw blade through the hole you’ve created in your sheet metal.
- Quick check: Have you attached the saw blade to the frame with the teeth of the blade running in the right direction? Carefully run your finger along the saw blade to check the teeth are running in a downward direction.
- Now you’re ready to saw your intricate cut-out pattern! Start by running your blade in a slow upward motion. This will give you a nice starting point to start sawing in a downward motion, making sure your saw frame is parallel to your work bench.
A guide to drilling holes in metal
Want to upgrade your jewellery tool kit? To pierce sheet metal and create accurate holes with ease, you may want to invest in a drill. You can opt for a handheld rotary drill kit – this is ideal when you’re starting out and can be easily carried from one workbench to another. If you’re looking for something with even more power, opt for a pendant drill with accompanying mandrels.
How to drill a hole in metal with a rotary drill kit
- This process is just like piercing a hole in metal. You’ll need to start by securing your metal sheet in place before you start drilling.
- Using a black marker pen, mark where you want to start drilling. You could also make a small dent using a hammer and centre punch – it’s completely up to you.
- Ensure you’ve secured the correct mandrel to your hand drill, and carefully start drilling through where you’ve marked your metal sheet. You can try varying the pressure but make sure you don’t put the metal under too much strain.
- Once you’ve drilled the hole to your required size, you can carry on crafting your piece.
Handheld rotary drills are ideal if you’re a beginner, as they can help ease you into drilling with a comfortable grip and full control. Once you build up the confidence to use larger, more powerful drills, you’ll be able to create a bigger variety of jewellery pieces and add more skills to your arsenal.
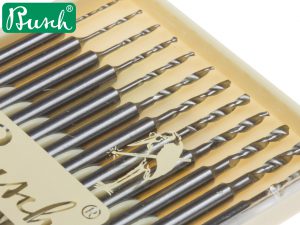
Not sure which drill bits are best suited to your jewellery making project when using a rotary drill kit or pendant drill? Get started by taking a look at our guide to the best drill bits for metal.
Drilling holes in metal using a pendant drill
Upgrading from handheld rotary drills? Pendant drills are designed for cutting, grinding, polishing and setting materials, enabling you to go further than simply drilling a hole in your metal.
- Secure your metal and outline clearly where you want to start drilling your hole. It’s important to get this right before you start drilling – unsecure metal could move under pressure of the mandrel and cause an accident.
- Secure the mandrel you want to use, and line it up with where you’ve marked for drilling. If you’re using the quick release pendant drill, you’ll notice how its versatility permits you to switch between attachments easily. You may wish to attach it to a drill stand for support, and you can either operate it using the foot pedal or by hand.
- Once you’ve finished drilling, you could even cut around your metal and start polishing it using a Calico pendant wheel and some polishing compound. Get the finish you want for your next creative piece.
So, there you have it – useful tips for cutting a hole in metal, and how to drill through metal using a variety of different jewellery tools and techniques. You don’t have to stop at holes either – why not use your pendant drill to cut your metal silhouette and polish it afterwards? You could even use your handheld rotary drill kit to engrave a pendant for a personalised gift.
Looking to create a new, exciting piece to add to your collection? Or perhaps you’re being commissioned to make something special and sentimental for a customer’s loved one? Experiment with different styles and techniques using jewellery tools from Cooksongold.

Cooksongold