A good starter project to become familiar with joining beads using wire, which opens up many design possibilities
Step One
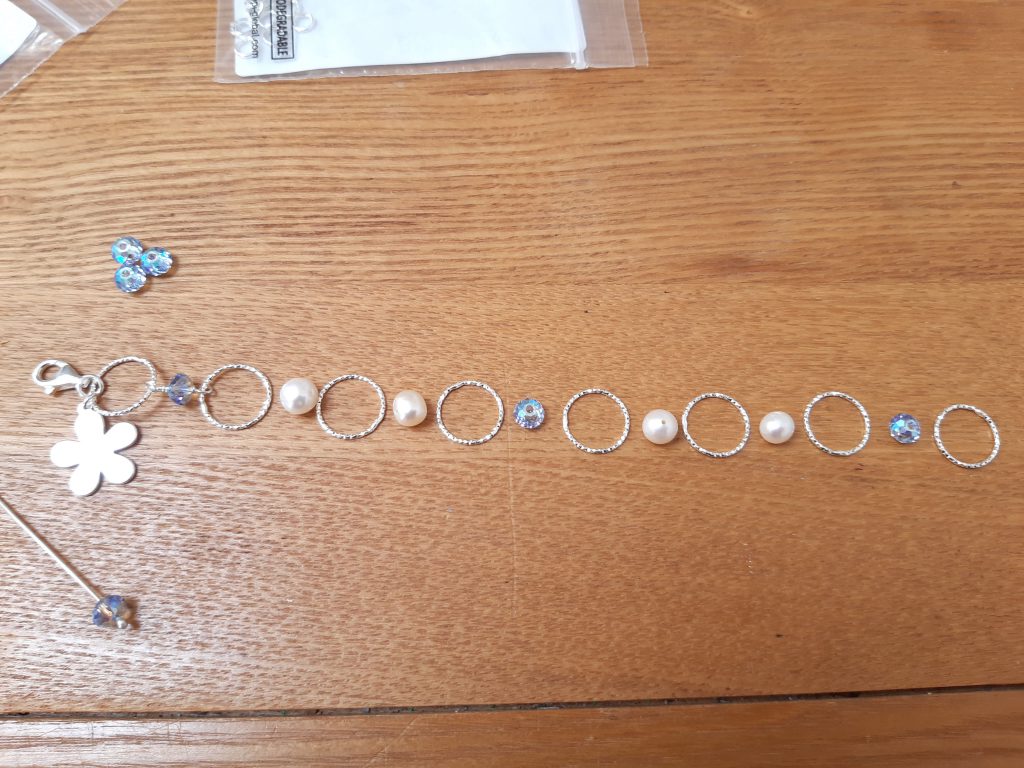
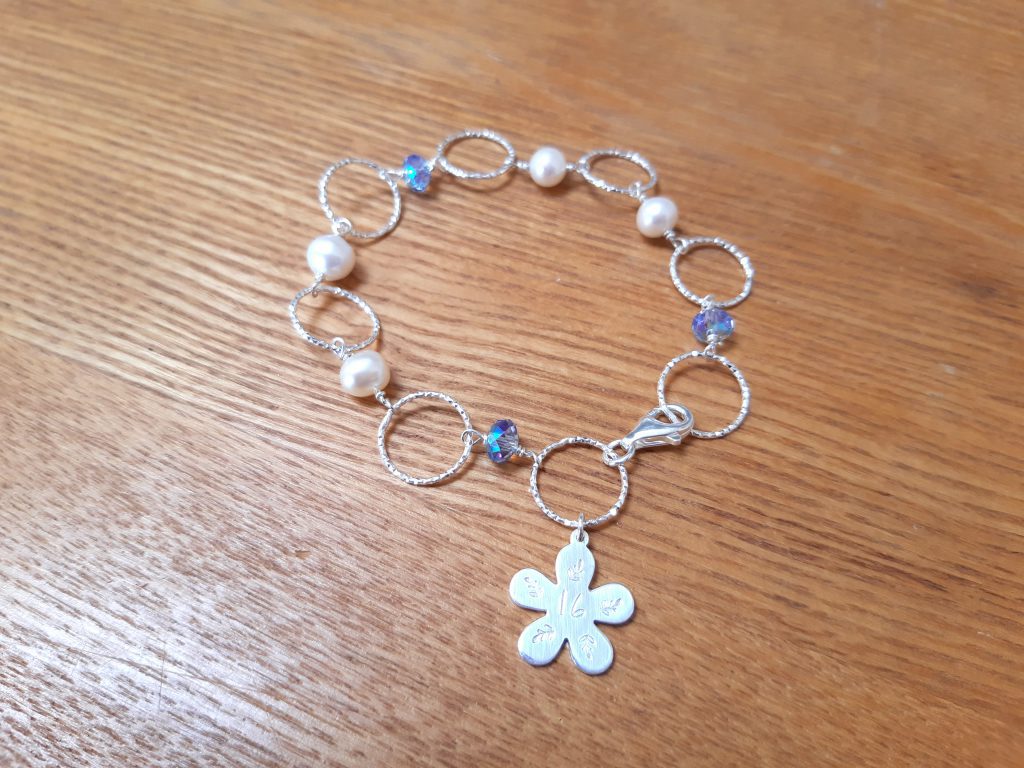
Lay out the decorative rings and beads to create a design. The finished bracelet will probably be 18cm – 22cm depending on wrist size.
The main technique in this project is wiring the beads. To start cut off approx. 5.5cm of .5mm sterling wire with your cutters. (This size is a guide, you may need more for bigger beads)
Step Two
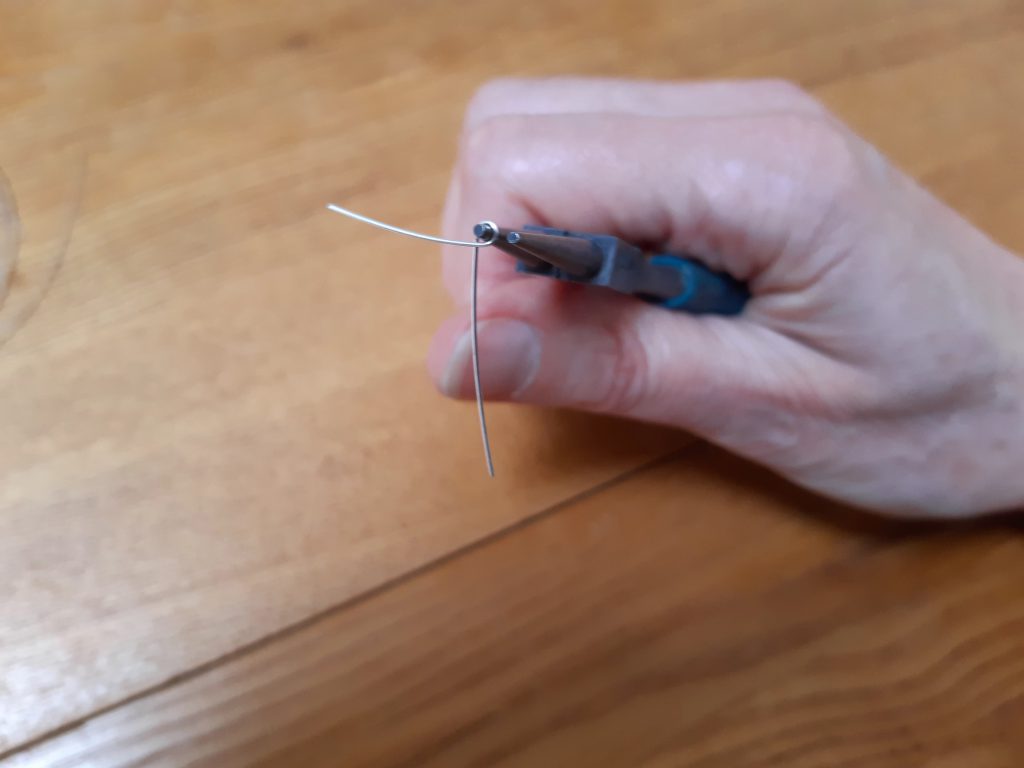
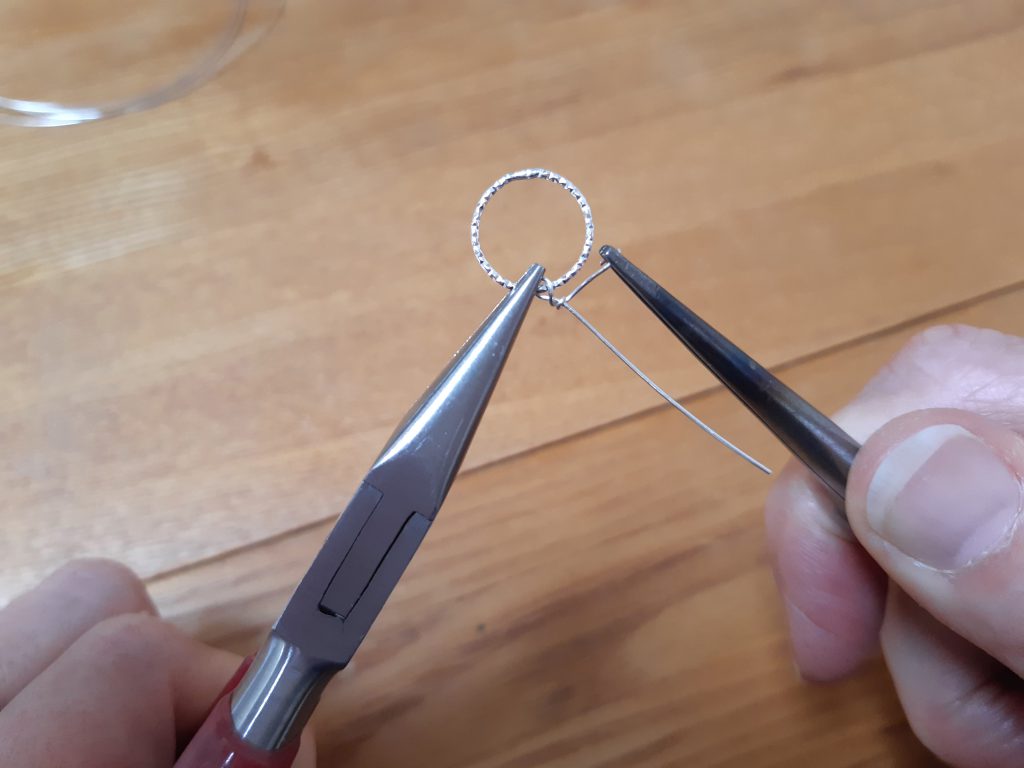
Using round nose pliers, wrap a loop in the wire just less than half way down. Work towards the points of the pliers so that your loops are not too big.
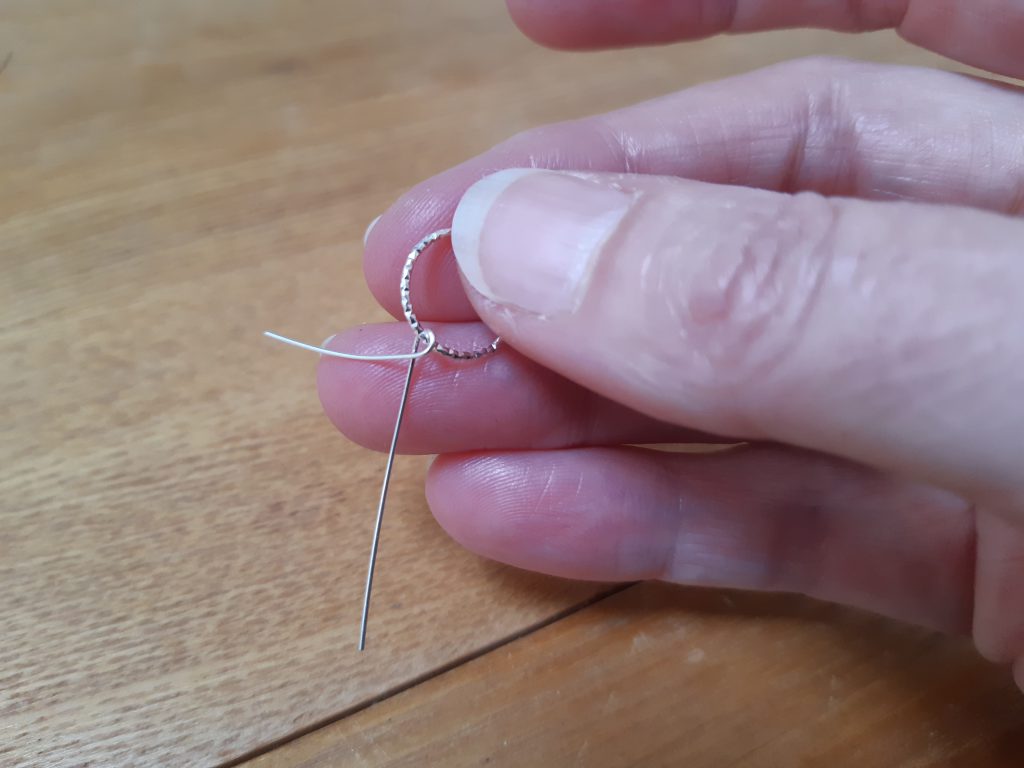
Take a decorative closed ring and slip inside the loop – take care not to stretch the loop out of shape.

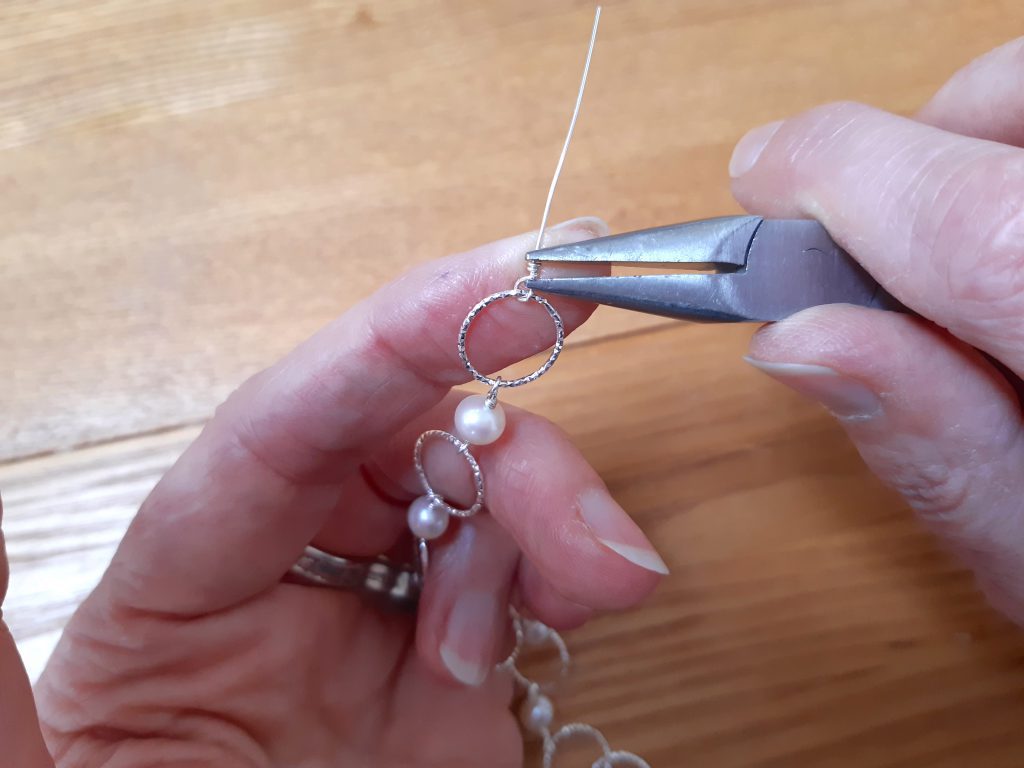
Hold the ring and the loop firmly with flat or snipe nose pliers as shown.
Step Three
Now use the long nose pliers to carefully wrap the shorter end of the wire around the longer end a couple of times. Snip off the short end neatly close to the coils you have made – remember to save your silver scraps!
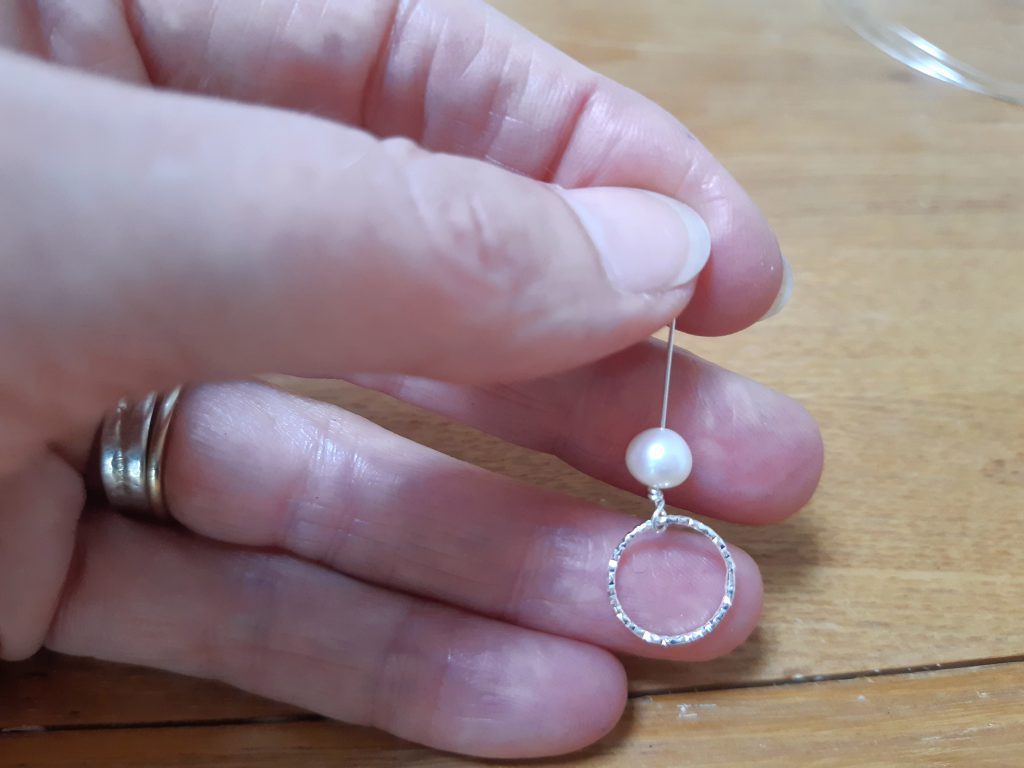
Thread your chosen bead onto the wire
Step Four
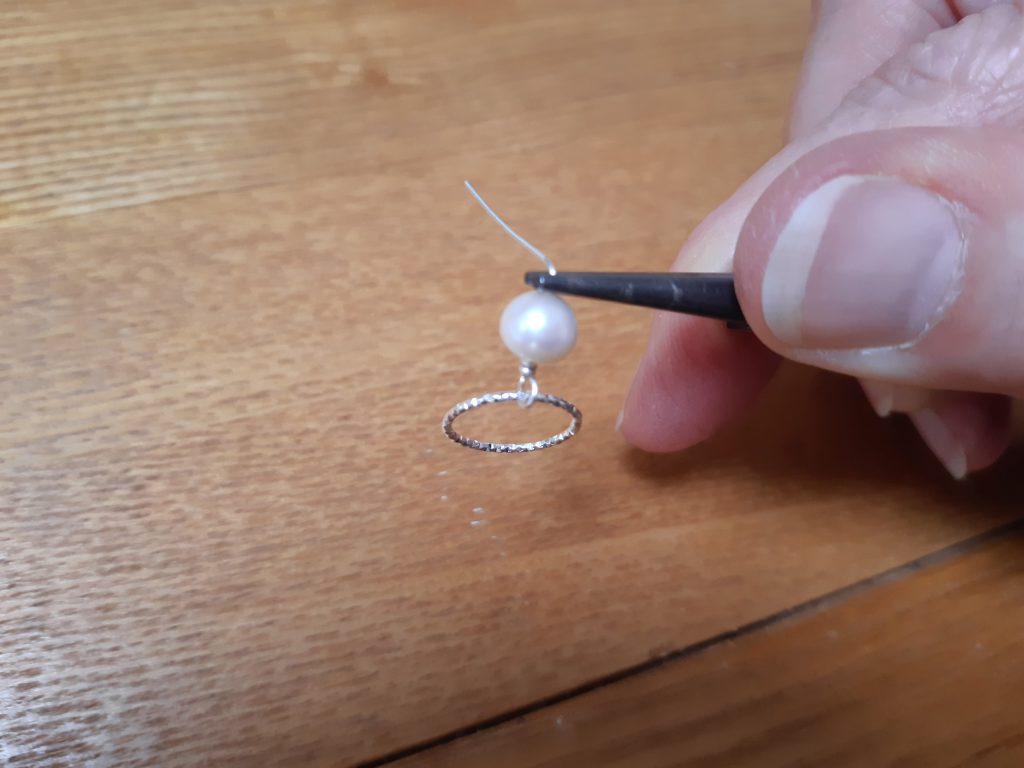
Hold the round nose pliers tightly against the bead and bend the wire into a right angle.
Step Five
Move the pliers slightly up into the bend and hold firmly. Twist a loop as before.
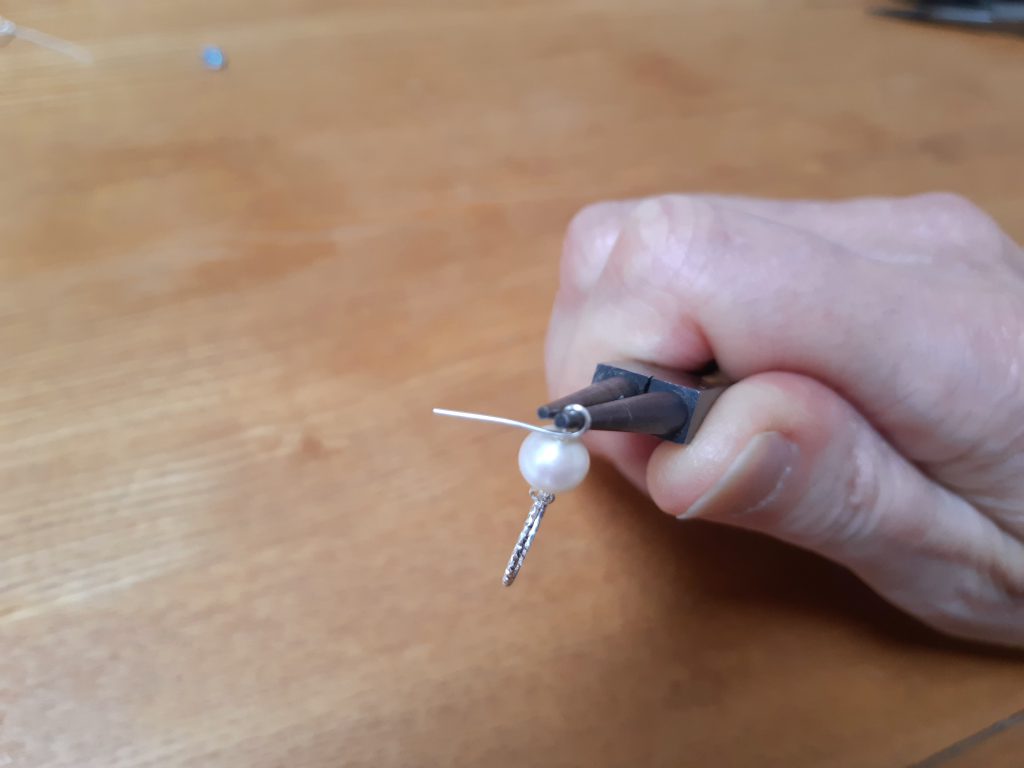
Slip another decorative ring into the loop you’ve just made.
Step Six
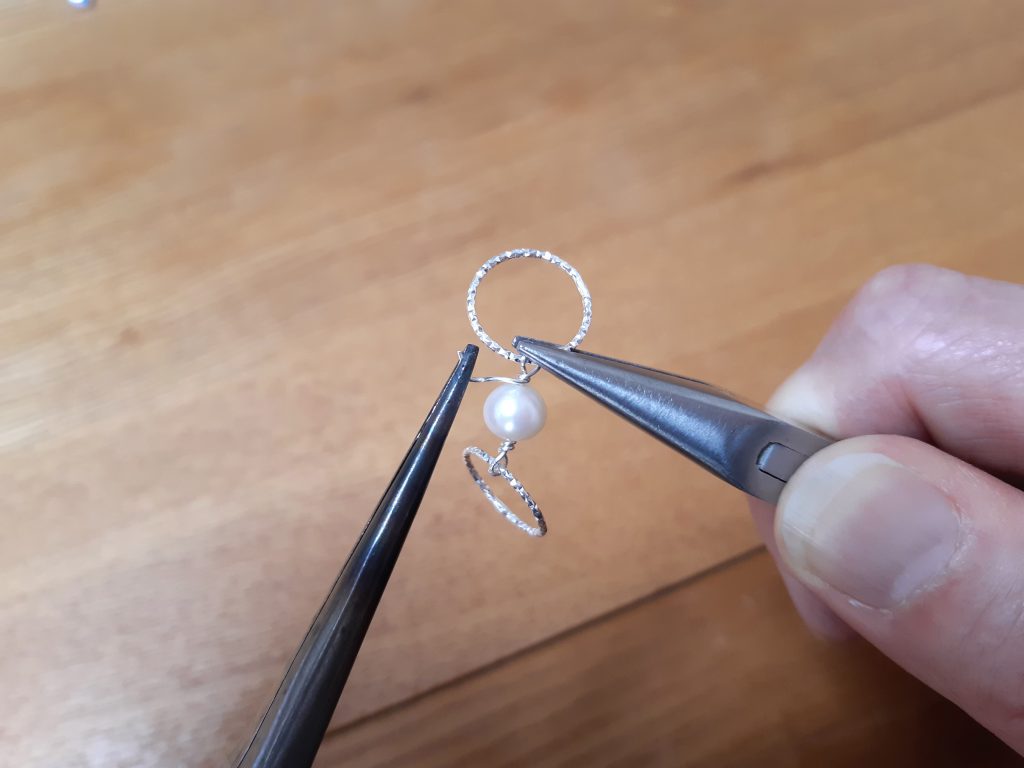
Then using your pliers to grip the loop as before, wrap the end of the wire close to the bead until it is tight, this should be a couple of wraps.
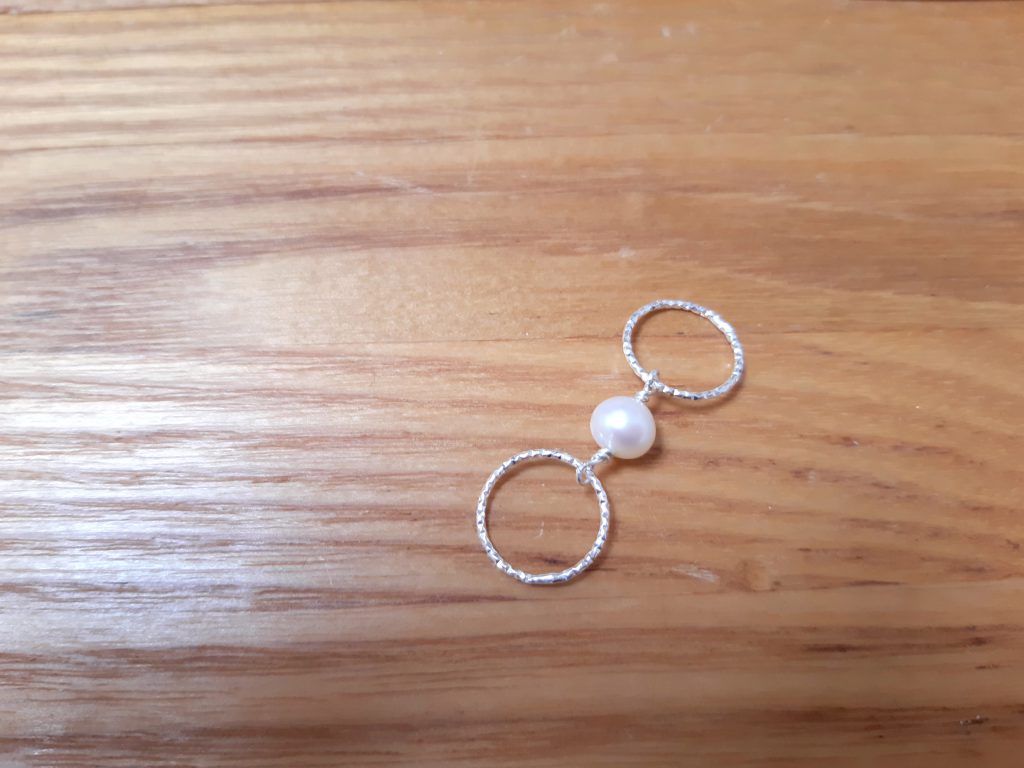
Carefully snip off the end – and you have your first wrapped bead section!*
Step Seven
Cut another length of silver wire and form a loop as before, and slip onto a ring from your first section and wrap the wire again.
Step Eight
Add a bead and continue in the same way joining to the next ring. If your wraps are a little gappy, you can tidy them by gently squeezing the coils using the snipe pliers.
Step Nine
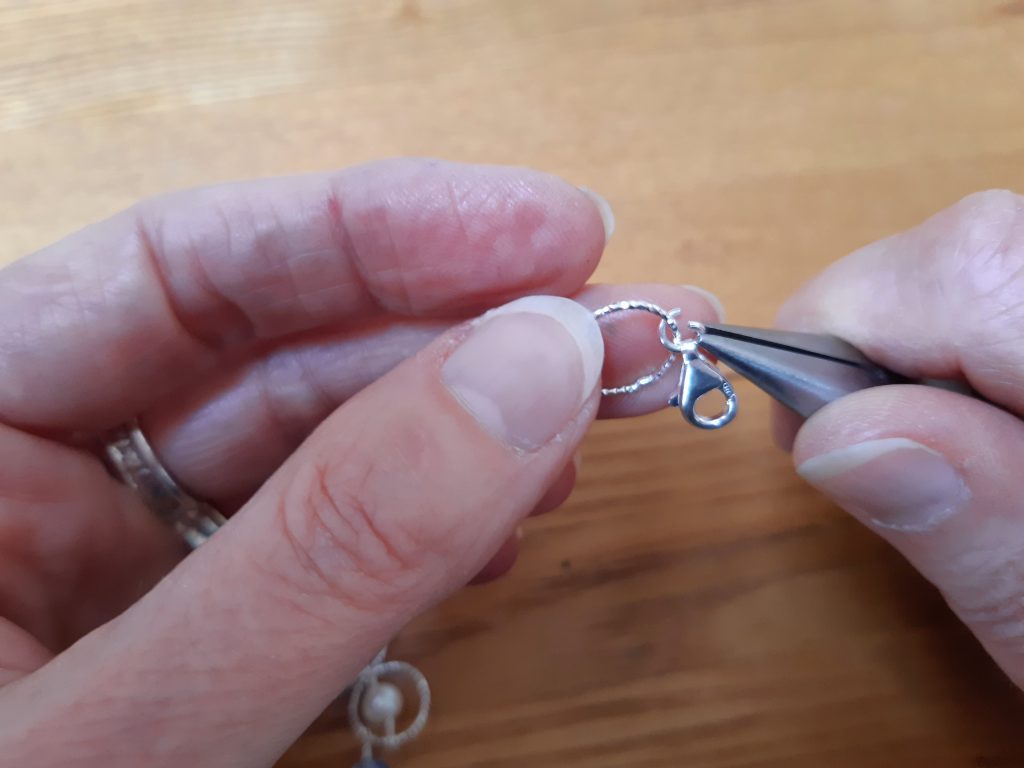
When your bracelet has 8 rings, add the trigger clasp to one of the ends using a 6mm heavy jump ring. To do this, twist the jump ring open using 2 flat pliers. (Do no pull open as this will deform the jump ring.) Slip the clasp and the last ring onto the jump ring and then close, easing the 2 ends of the jump ring together neatly.
Try on your wrist for length. If it fits – well done, you have finished the wiring part!
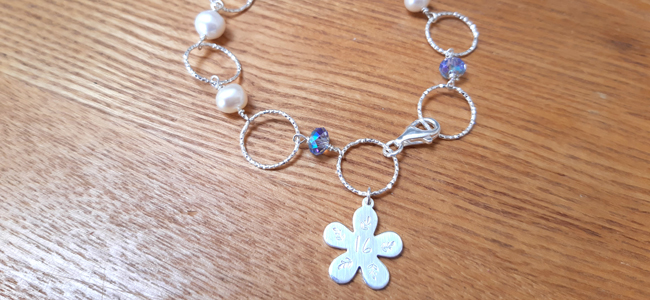
Now you can add a charm – eg flower blank.
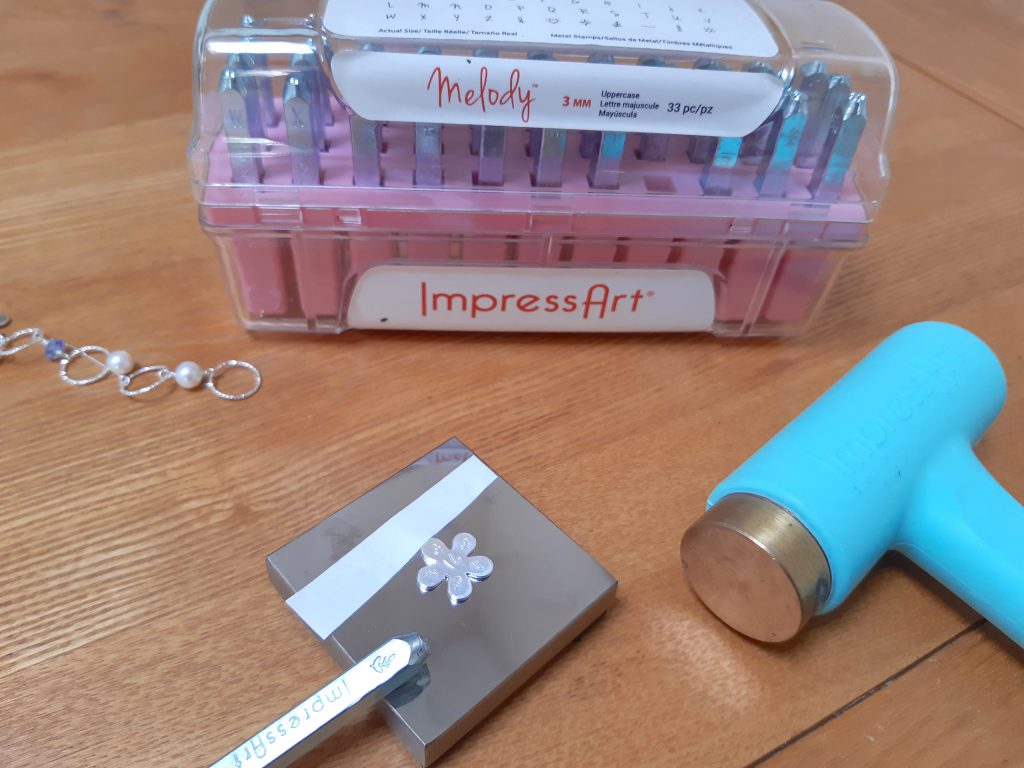
You can personalise the blank by stamping with letters, numbers or pattern.
Step Ten
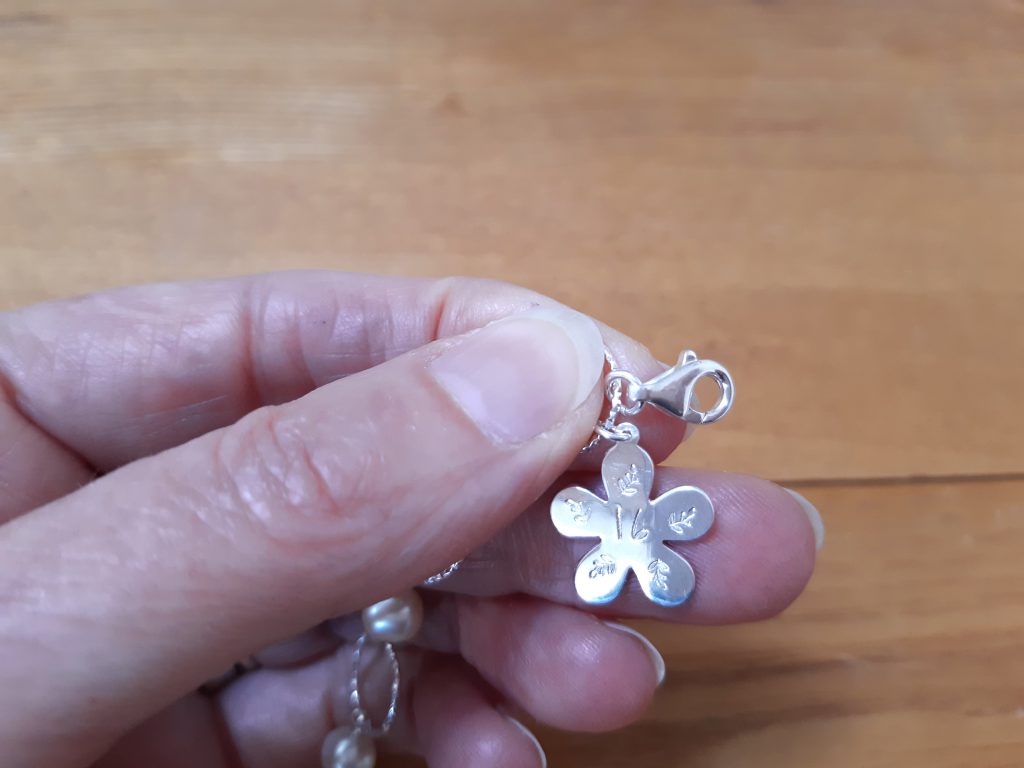
Use a jump ring to add the flowers to the ring with the clasp.
And there you have your bracelet!
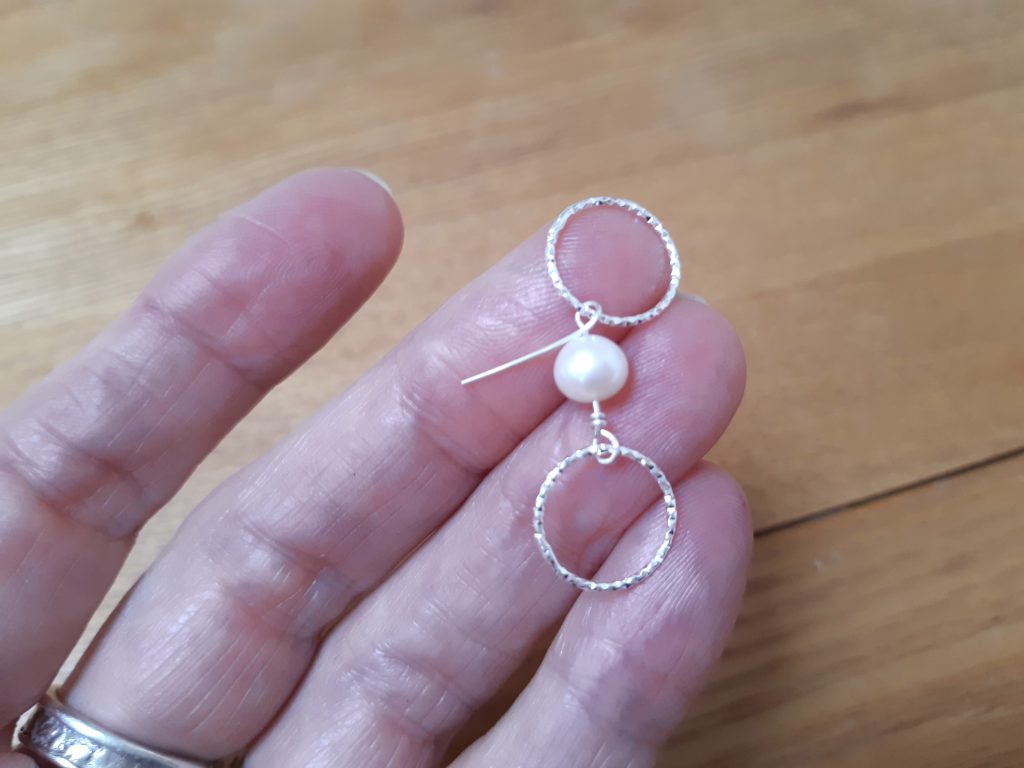
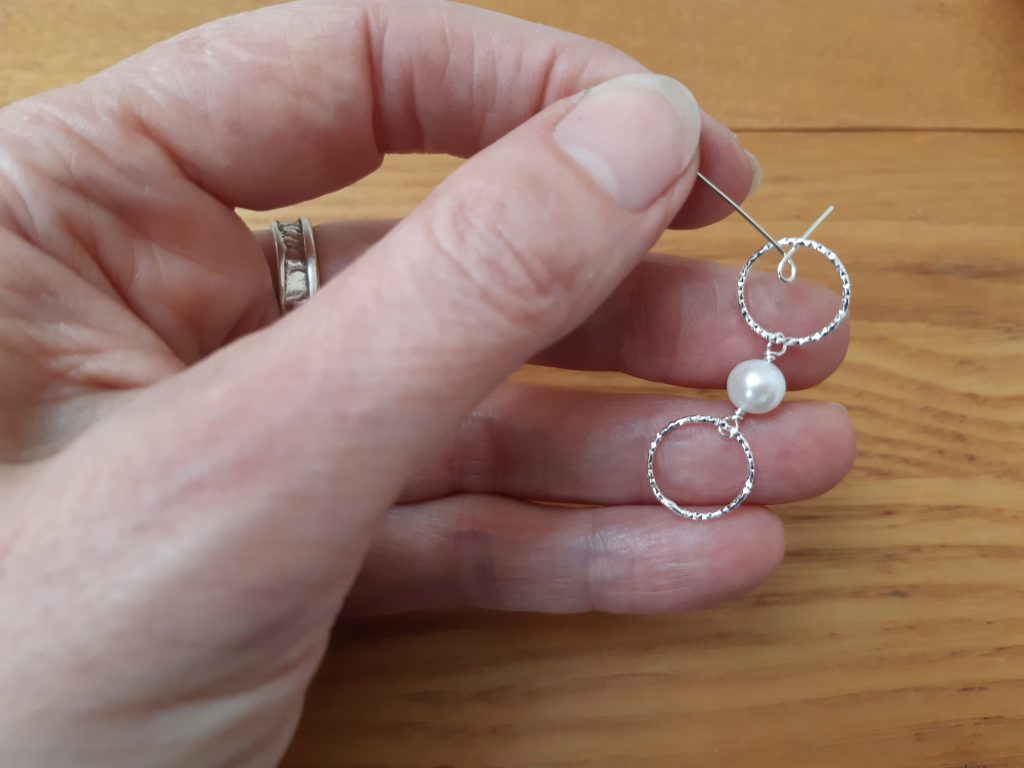
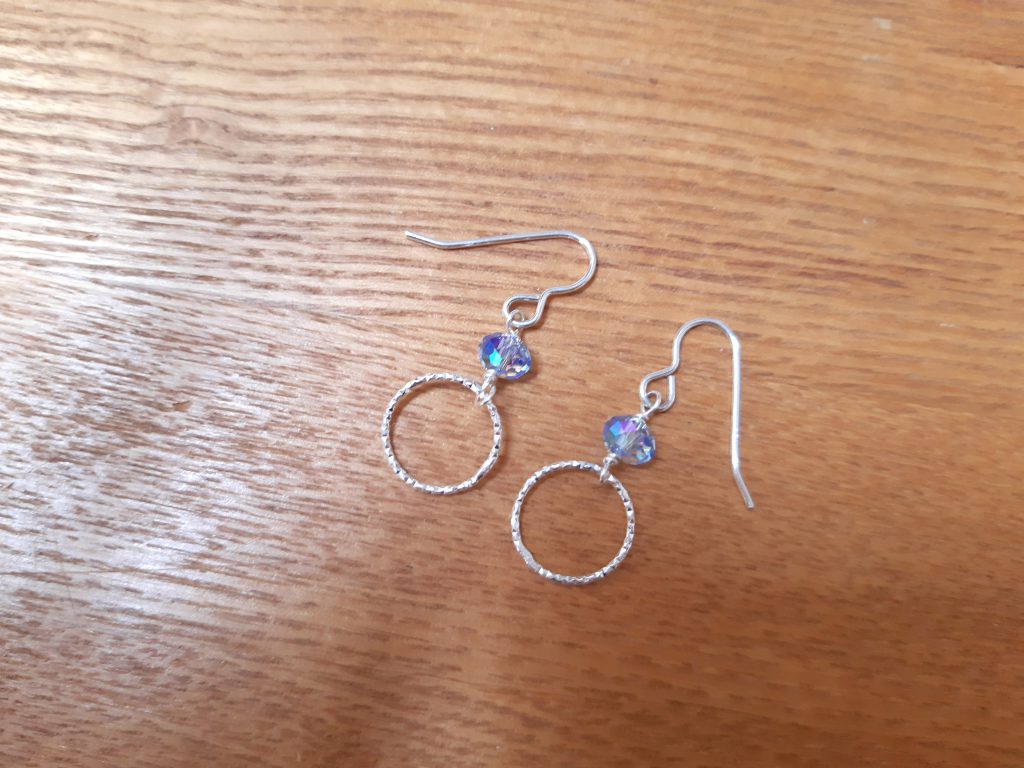
You can use this technique to make hoop earrings using a bead wrapped to a ring and attached to ear hoops.
Top Tip – Note that you can practise with copper wire first, if this is new to you, until you feel confident.
We want to see what you have been making! Share your creations with us on social media, tagging in Cooksongold on Facebook, Twitter and Instagram.
Janet Royle
Working in silver, gold and beautiful gemstones (sometimes combined with original antique pieces), Janet blends traditional skills and modern technologies to create her unique collections.