Working with Fimo clay is so much fun! An easy-to-use moldable clay, Fimo clay comes in a range of colours that can also be mixed making them perfect for a range of creative projects including a fantastic trinket dish.
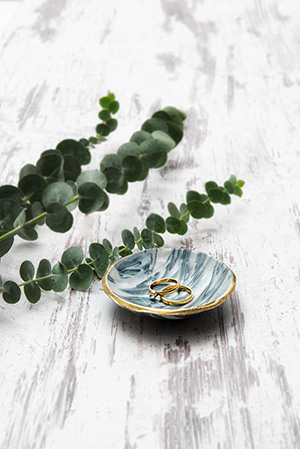
Trinket dishes or ring dishes as they can be referred to, are a practical and charming way to store jewellery. Ideal for displaying and storing every day jewellery pieces on your bedside table; dressing table and other surfaces a trinket dish can become a fantastic statement piece.
Did you know that you can easily create your own trinket dish using FIMO clay. Our Fimo effect range is a fantastic choice for creating a marble effect and so we have put together this easy-to-follow, step by step guide on creating your own trinket dish that is easy to make for yourself or as a gift.
Make a Fimo Ring Dish / Trinket Dish
Time needed: 35 minutes
Degree of difficulty: Easy
Other materials: Smooth working surface (glass or ceramic), ovenproof metal or ceramic bowl approx. 12 cm in diameter, 1 round cutter approx. 10 cm in diameter; 2 soft paintbrushes, broad and round
Our Step By Step Guide
Step 1:
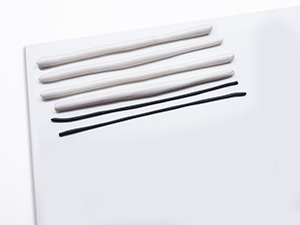
Knead one block of FIMO effect mother-of-pearl and one portion of FIMO soft black until soft and roll out into 4 thicker and 2 thinner cords.
Step 2:
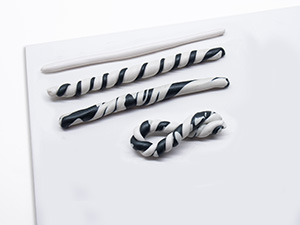
Twist the thinner black cords with the thicker white cords and roll out again into a sausage shape.
Step 3:
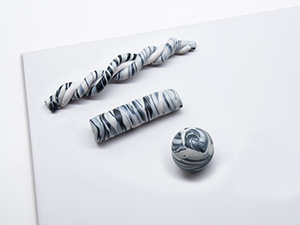
Twist the resulting rolls together with a white cord and roll into a short, fat sausage, then shape into a ball.
The marbling will be different every time – this is part of the appeal of these pretty bowls. Here are a few tricks to help you create your desired marble effect:
- use different proportions of light and dark colours
- twist the FIMO effect cords together different numbers of times
- cut the ball horizontally through the middle
Step 4:
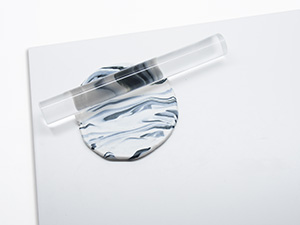
Press the ball slightly flat with your hand and roll out into a sheet about 2 mm thick using the acrylic roller.
Step 5:
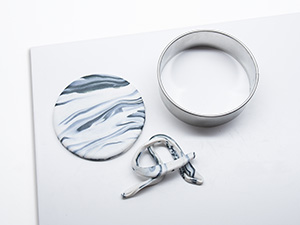
Cut a circle from the centre of the sheet using the round cutter. To ensure that the edges are sharp, make sure you push the cutter all the way through the FIMO effect and turn it slightly as you do so.
Step 6:
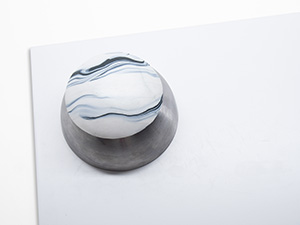
Place the FIMO effect circle on an upturned ovenproof bowl about 12 cm in diameter and press down. Take care to keep the edges sharp. Then harden in the oven for 30 minutes at 110° C / 230° F and leave to cool.
Step 7:
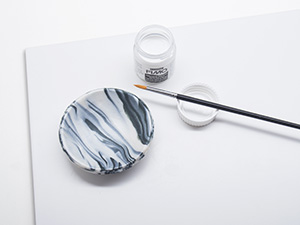
Apply a good amount of size for leaf metal to the edge of the bowl. Use a cloth to wipe away any liquid that drips down. Leave to dry for approx. 10-15 minutes, until no milky areas are visible.
Step 8:

Apply thin strips of leaf metal to the edge using a soft, broad brush and press down carefully. Brush backwards and forwards over the surface with a broad, dry brush to remove any excess. To protect the gold edging, varnish with gloss varnish and leave to dry.
Ready to start making with Fimo clay? Fimo presents such a fun and creative way to make some really unique pieces. We used Fimo effect for this particular project but there are so many different types of Fimo clay that can be used for a range of projects so take a look at all of the options and the tools and accessories and start creating today.
Working with Fimo clay sis such a fun hobby and a great way to start your journey into jewellery making. Check out our other Fimo projects and see just how much you can make with your clay!

Cooksongold