For jewellery makers of all skill levels, we’ve put together this step by step silver clay project. You will learn how to form a delicate bow-shaped pendant, integrate a sparkling Cubic Zirconia gemstone and complete your piece with professional finishing techniques. Whether you’re new to metal clay or looking to expand your jewellery making skills, working with silver clay is a great way to express your style.
Making Silver Clay Jewellery
Making jewellery from silver clay is such a great way to truly experiment with your designs and get creative. Mouldable like standard modelling clay, silver clay can easily be shaped to make jewellery, customised with texture, letters and so much more. The opportunities to make with silver clay really are endless.
Follow the below steps and get started on this making your own silver clay necklace.
What You Need:
- 1x Metal clay starter kit
- 1x Blowtorch
- 1x Soldering block
- 1x Butane gas
- 1x bow and flowers flexible clay mould
- 1x Silver polishing cloth
- 1x 2mm round Cubic Zirconia
- 1x 7g pack of Art Clay Silver
- 1x 0.9mm sterling silver diamond cut curb chain 18”/ 45cm in length
Step 1
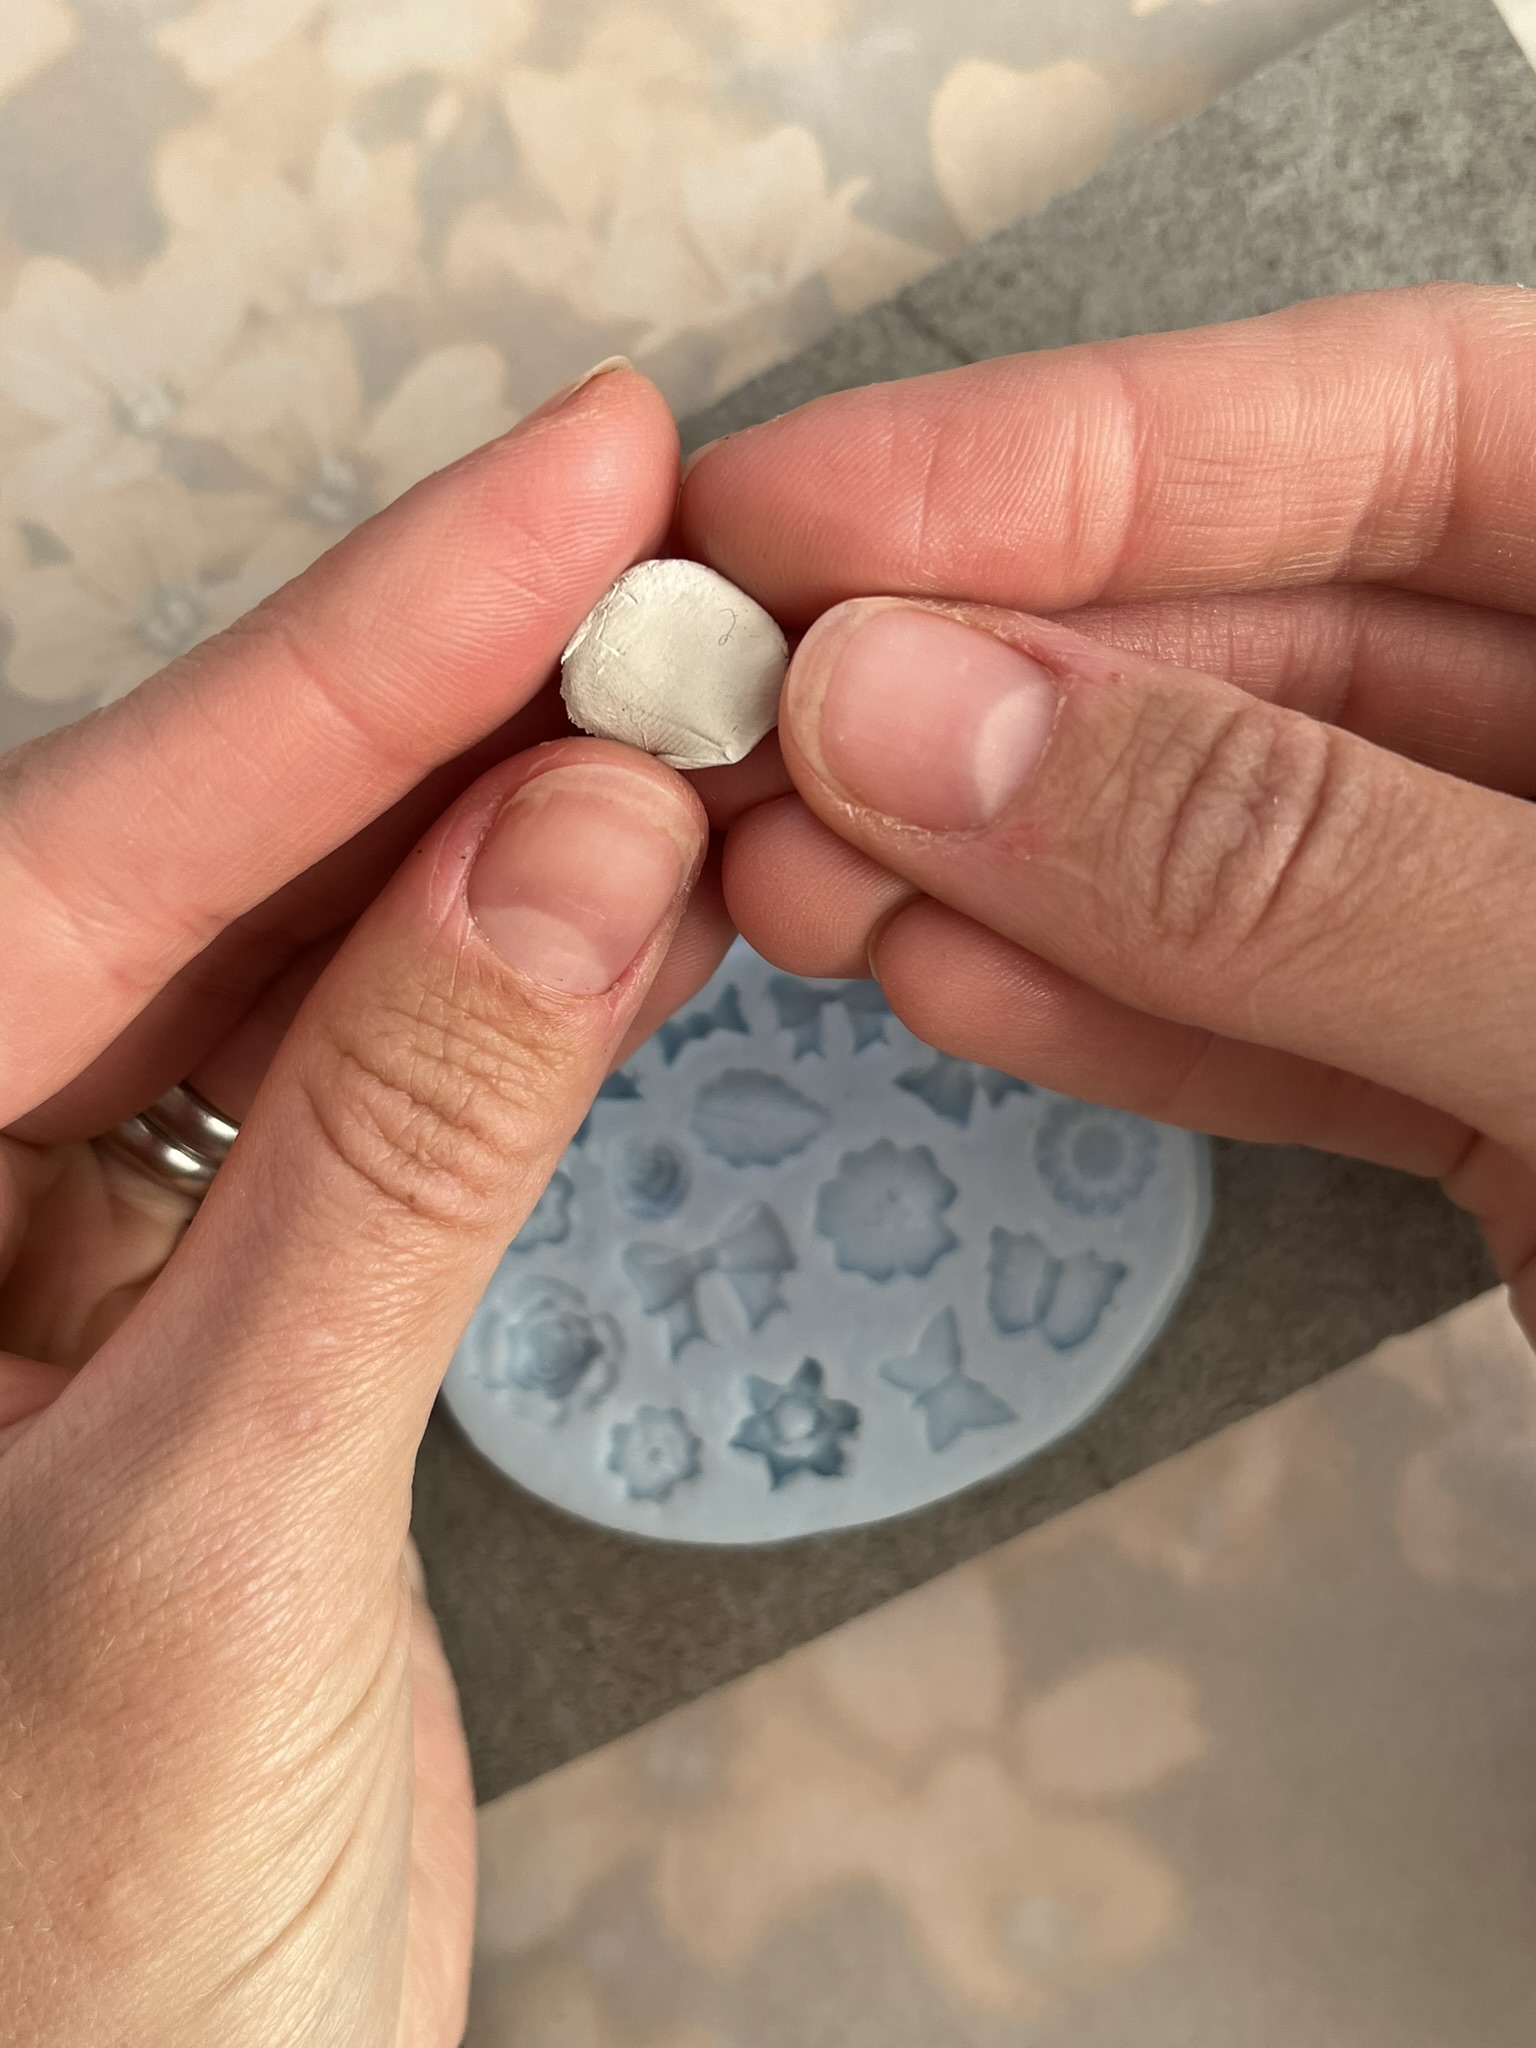
Take a small amount of silver clay, knead it if necessary and push it into the bow shape on the mould.
Note: You may wish to apply a little olive oil or metal clay balm on the mould to help release the silver clay from the mould.
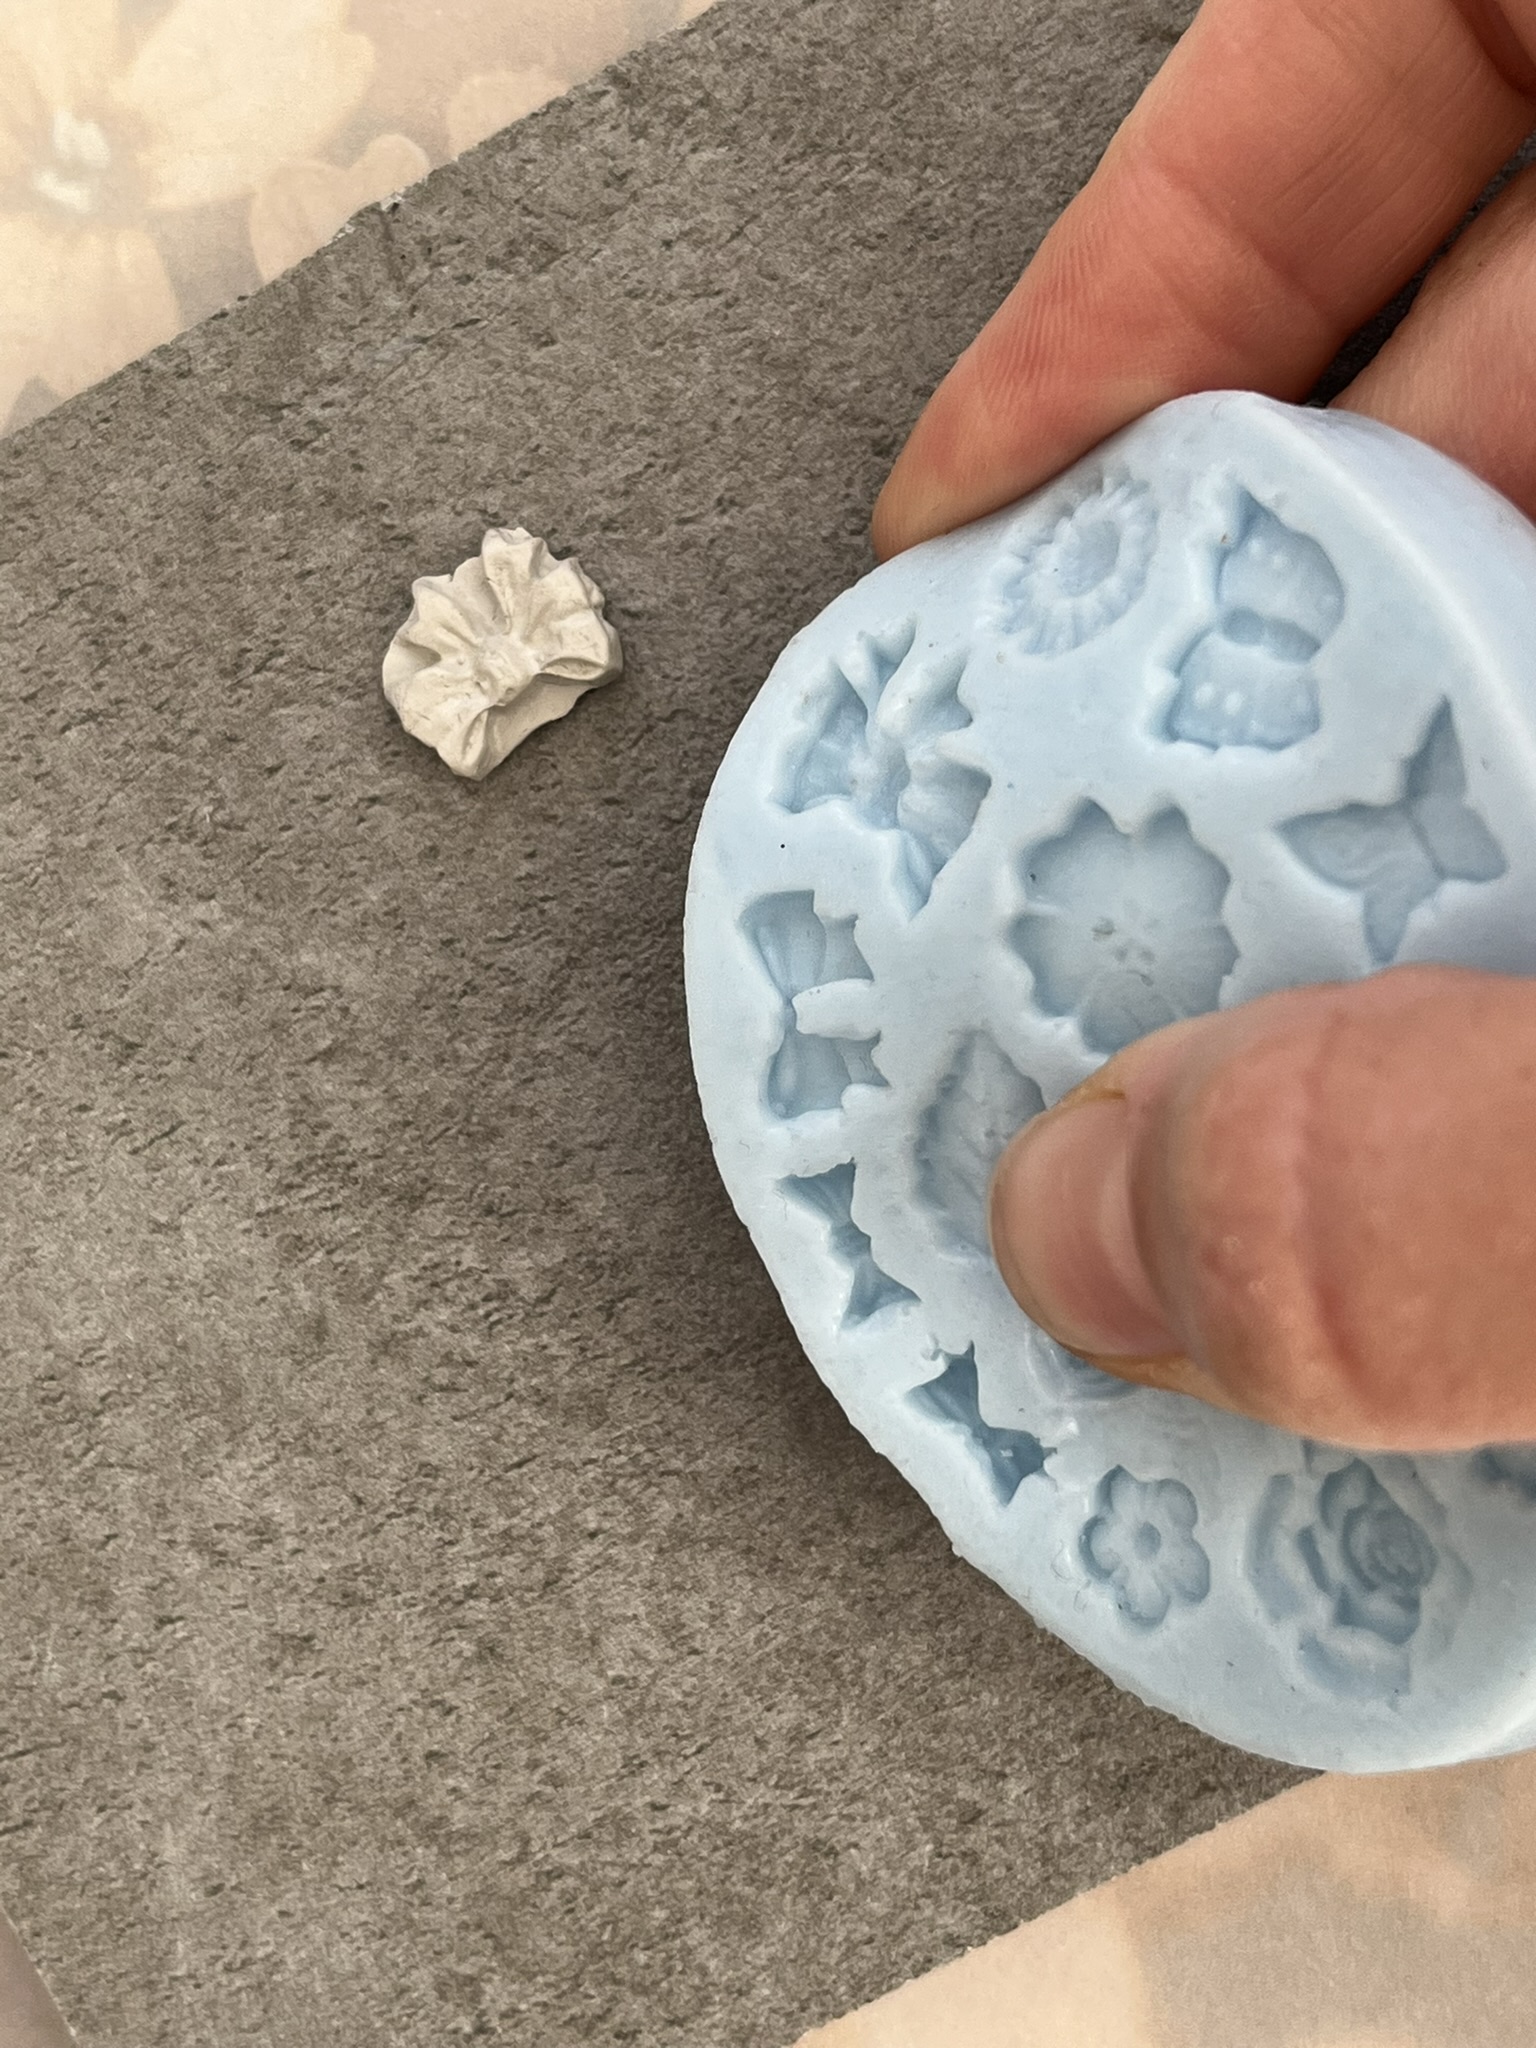
Step 2
When you are satisfied that the silver clay has been pushed into all the detail of the bow, gently flex the mould and push the bow out.
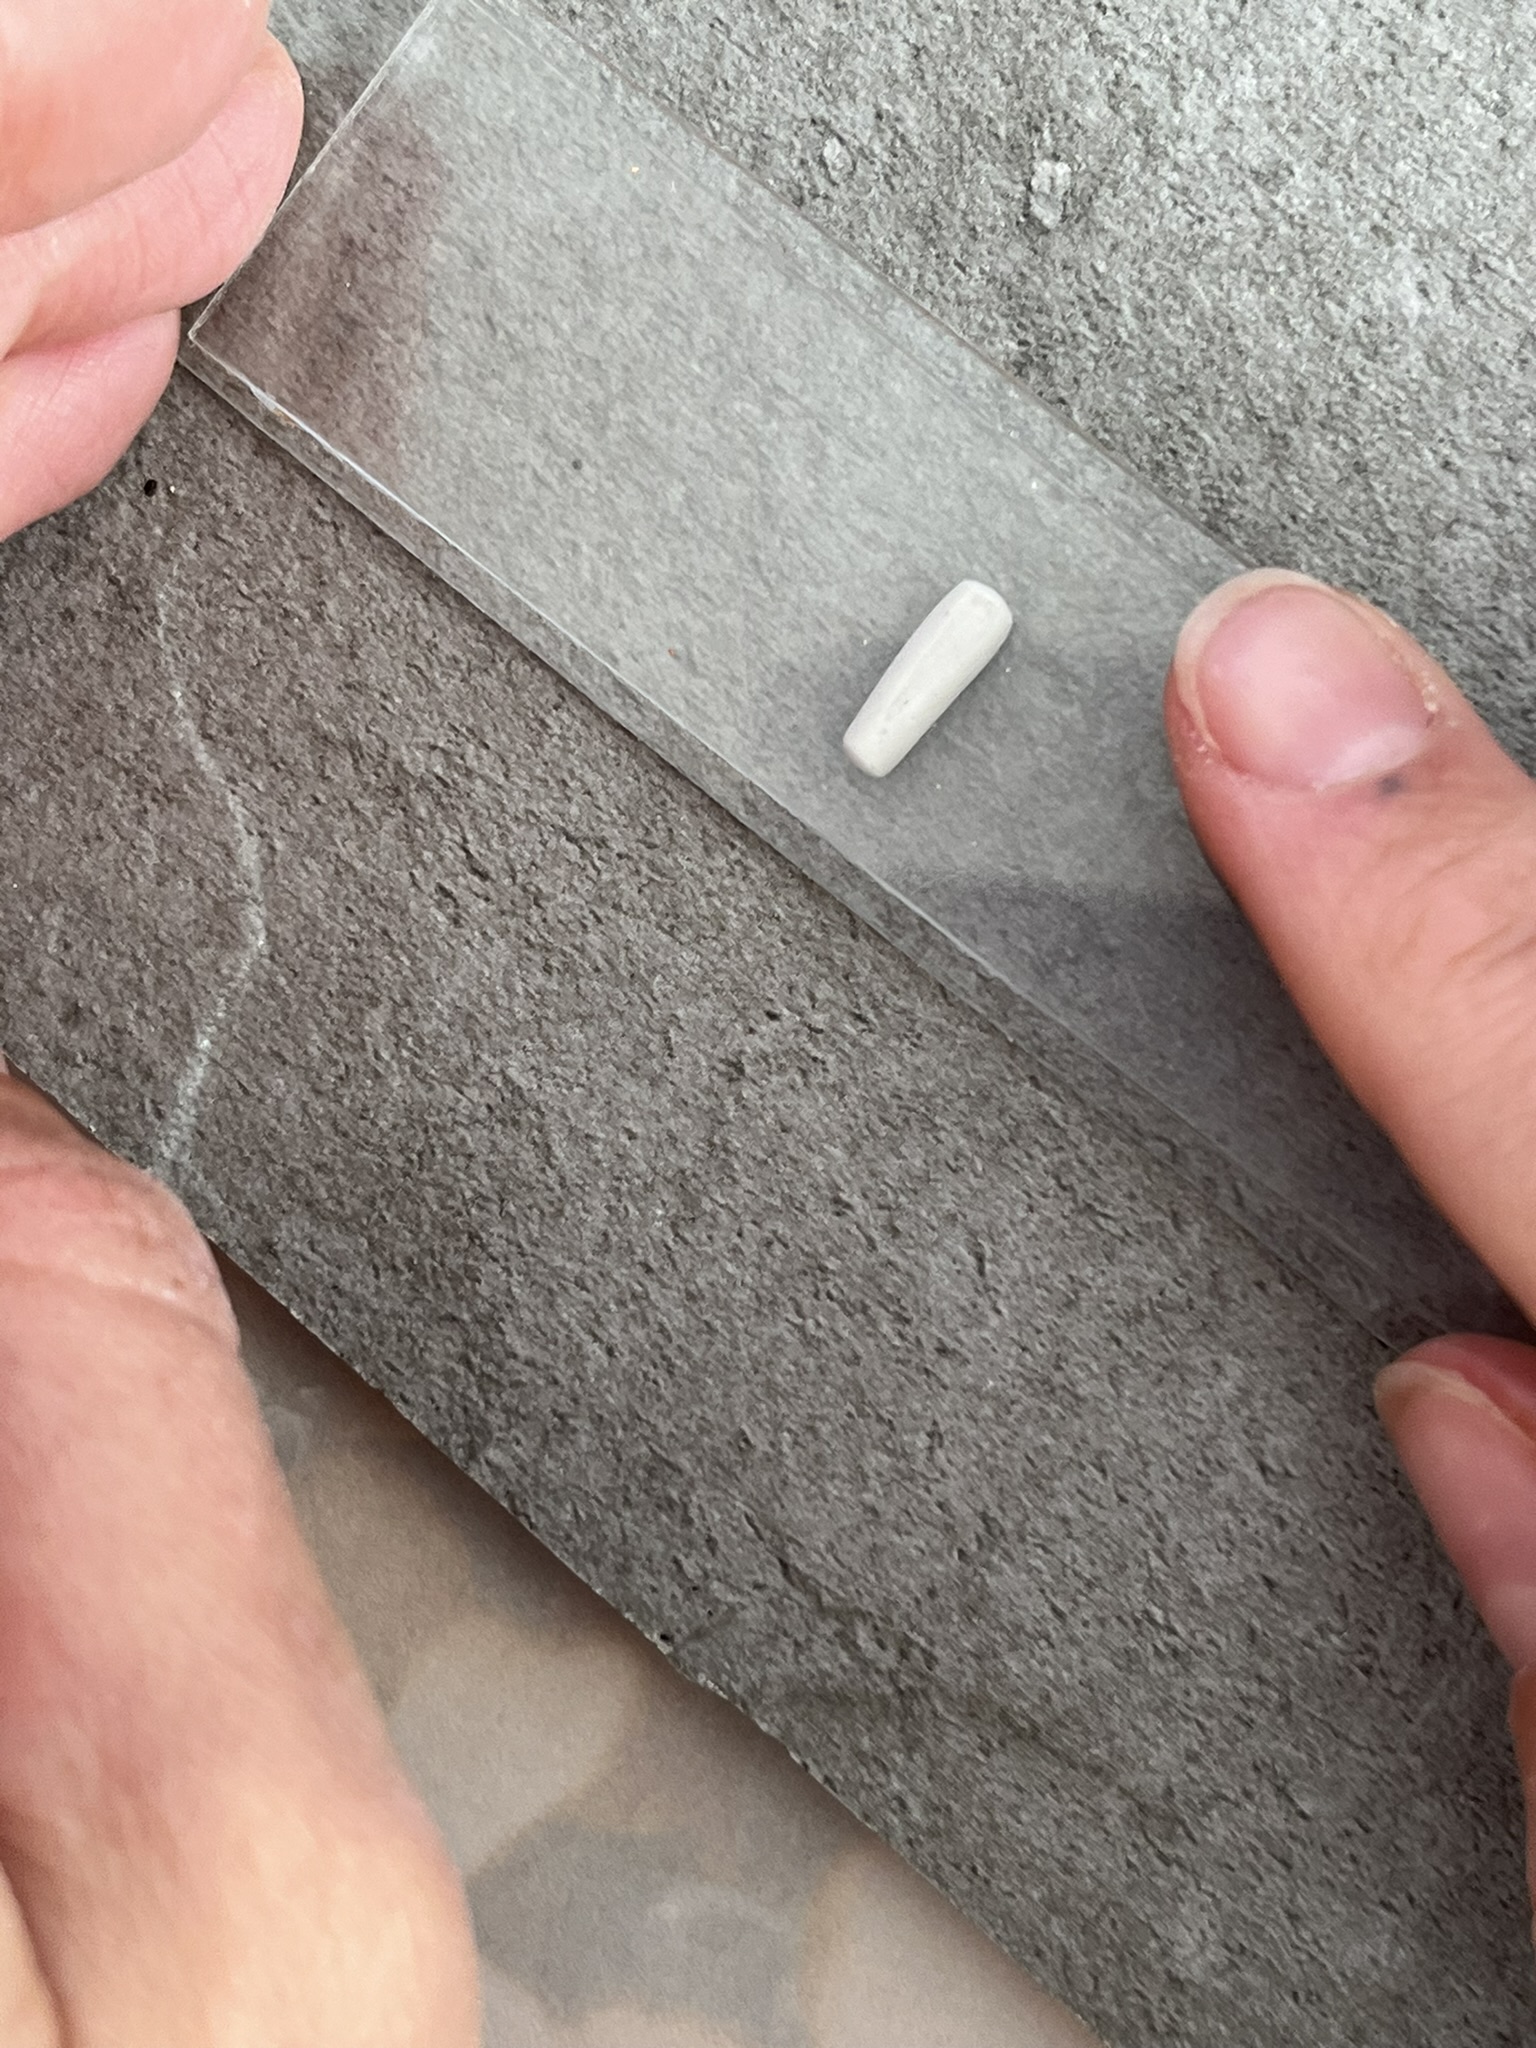
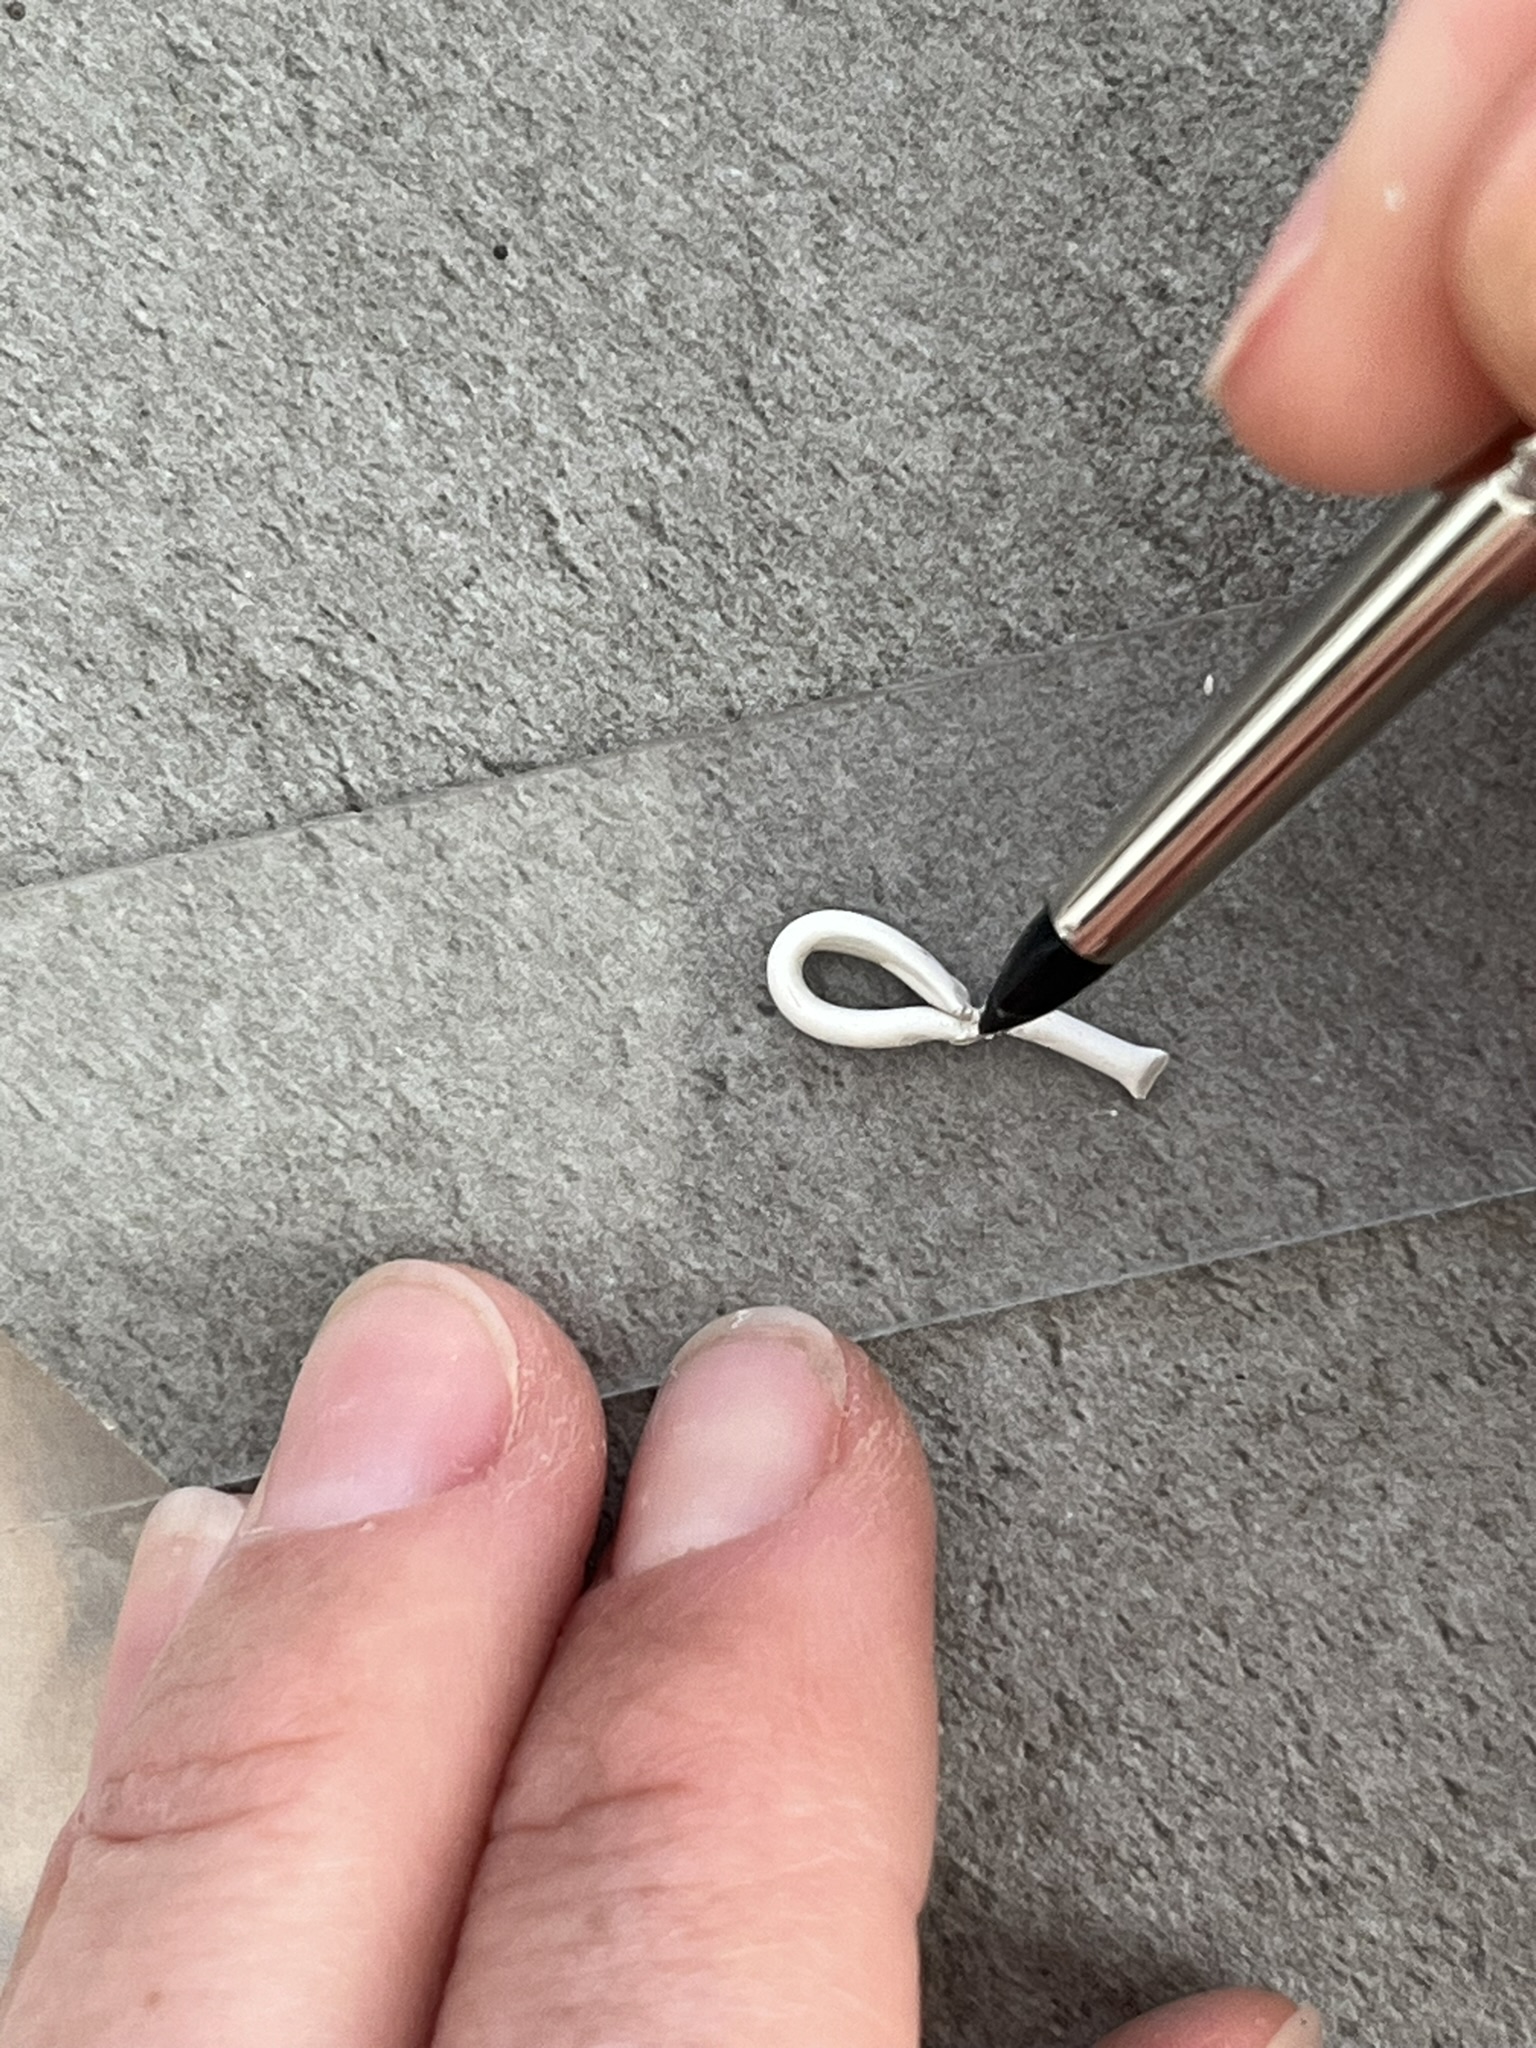
Step 3
Take a smaller piece of silver clay and roll it into a thin snake shape. The best method is to use an acrylic sheet, gently running it back and forth over the silver clay until it forms a long snake shape.
Step 4
Fold the silver clay snake into a loop and gently join the two ends in the middle so they become one loop. Ensure your loop will be big enough for a chain to easily thread through. Cut off any excess silver clay and add the loop to the top of the silver clay bow. Blend the edges of the bow with the loop adding any additional clay or silver paste to ensure a smooth and secure join.
Note: If your silver clay is dry or will not easily join together, you could use a little water with a paintbrush to go over the join or alternatively apply a little silver clay paste.
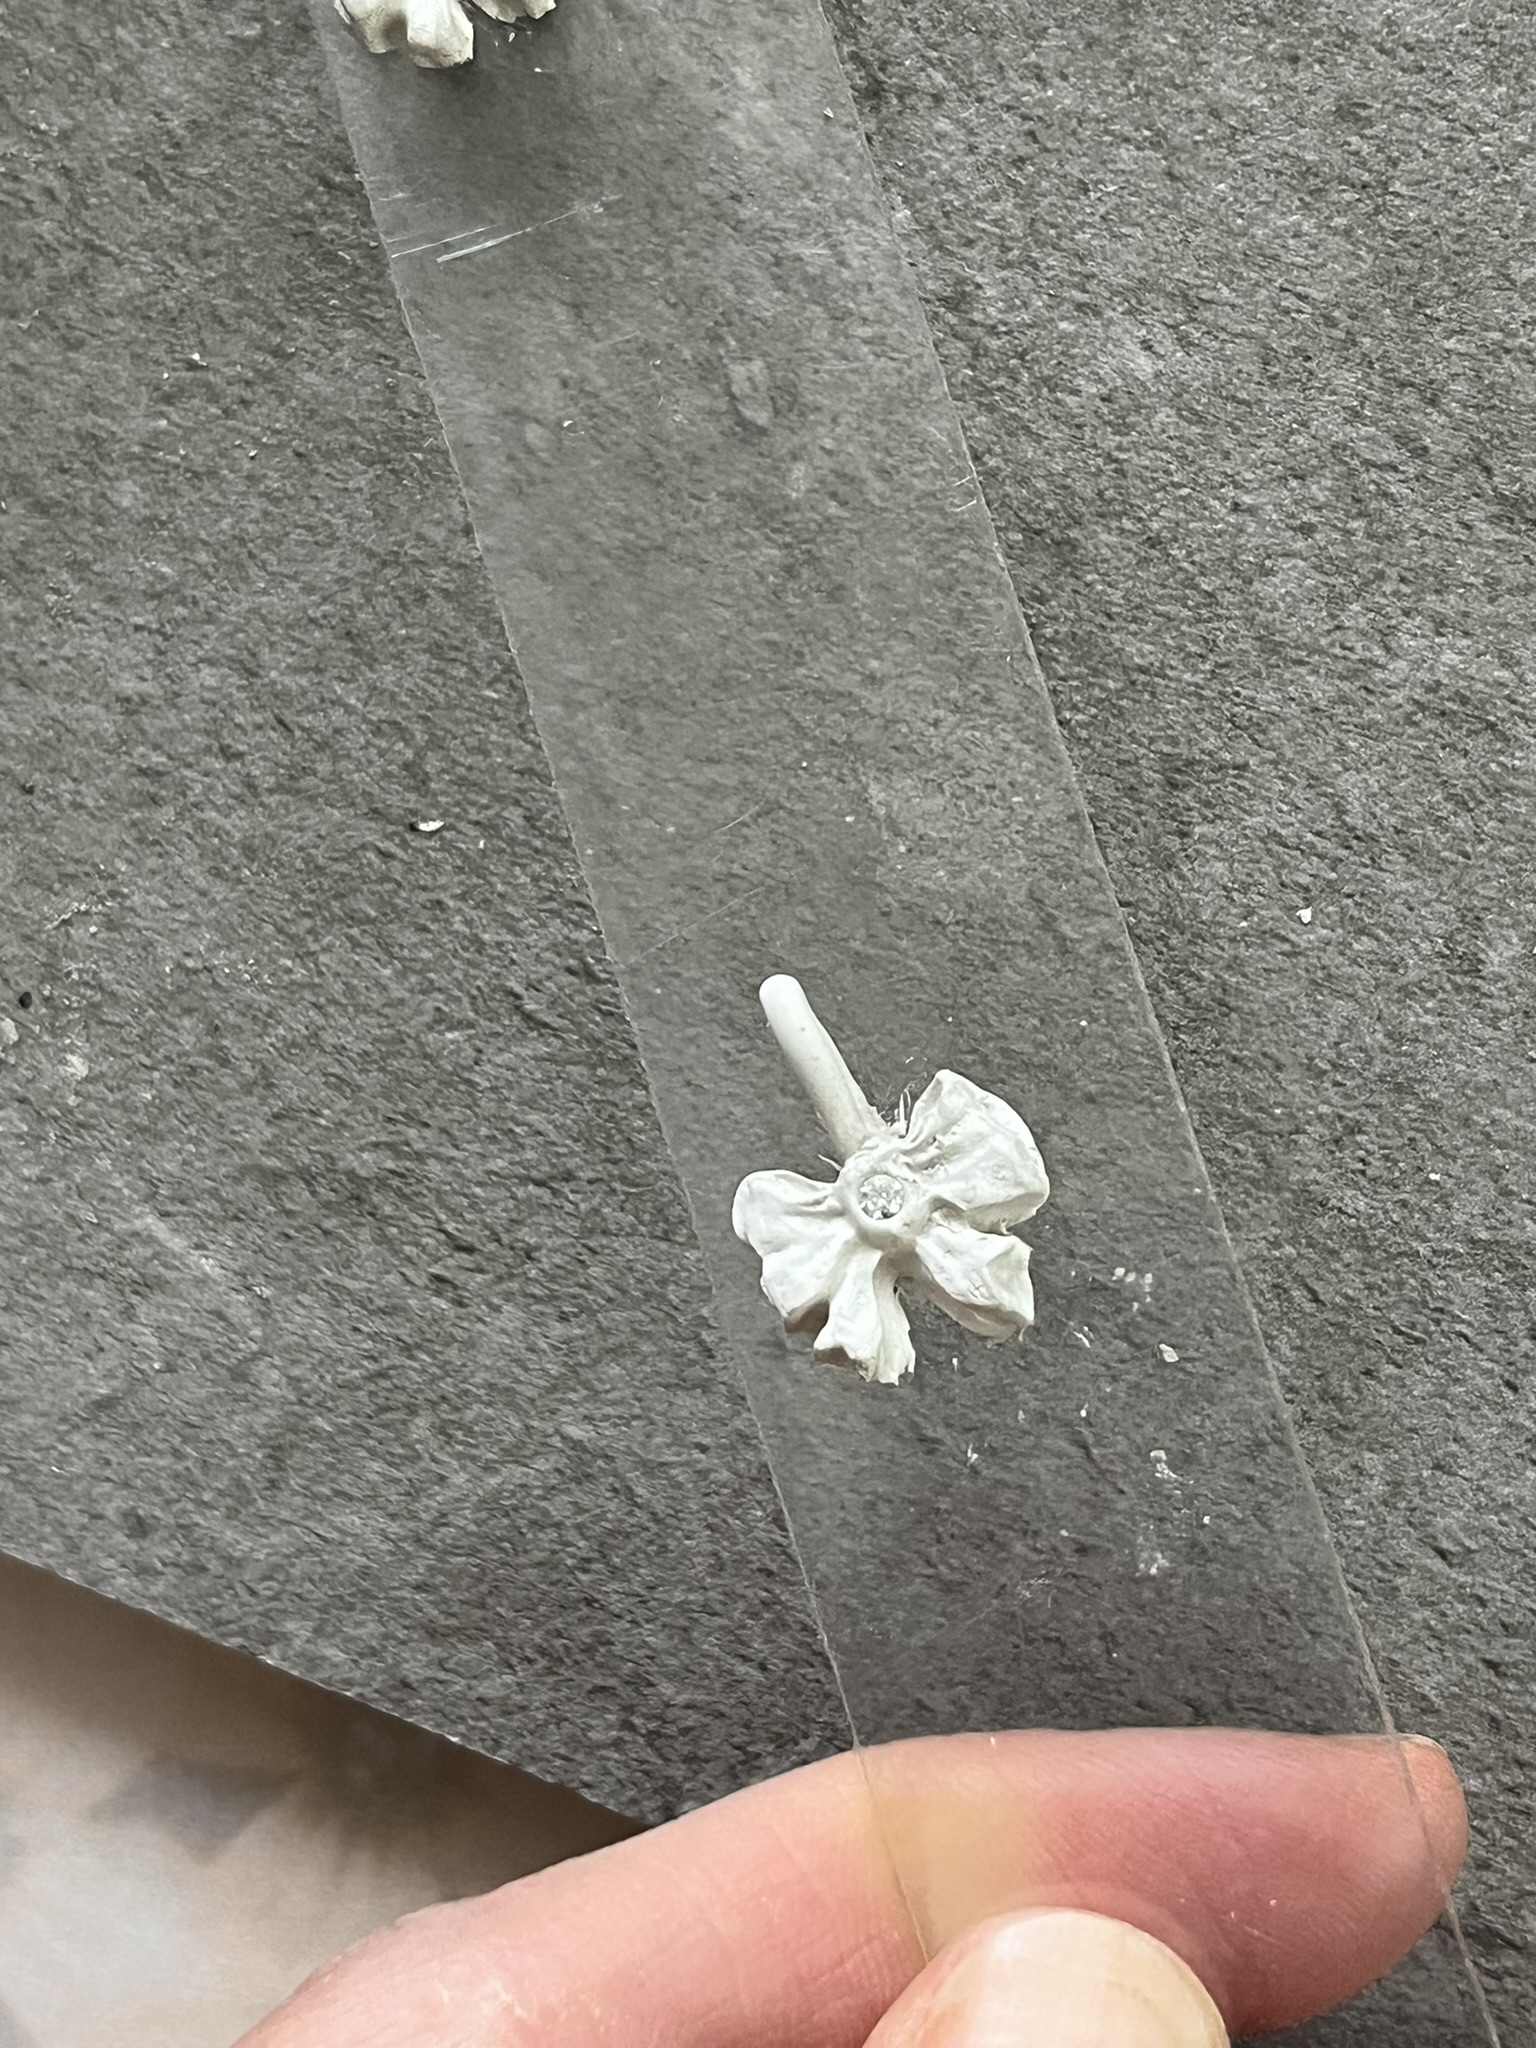
Step 5
Make a small dent in the middle of the silver clay bow using the end of a pencil or a clay shaper tool. Place the Cubic Zirconia (CZ) point down in the dent created. Push the CZ well into the silver clay as you don’t want it to be pushed out when the clay shrinks during firing.
Note: You could use a gem stick or Blu Tack to pick up the CZ.
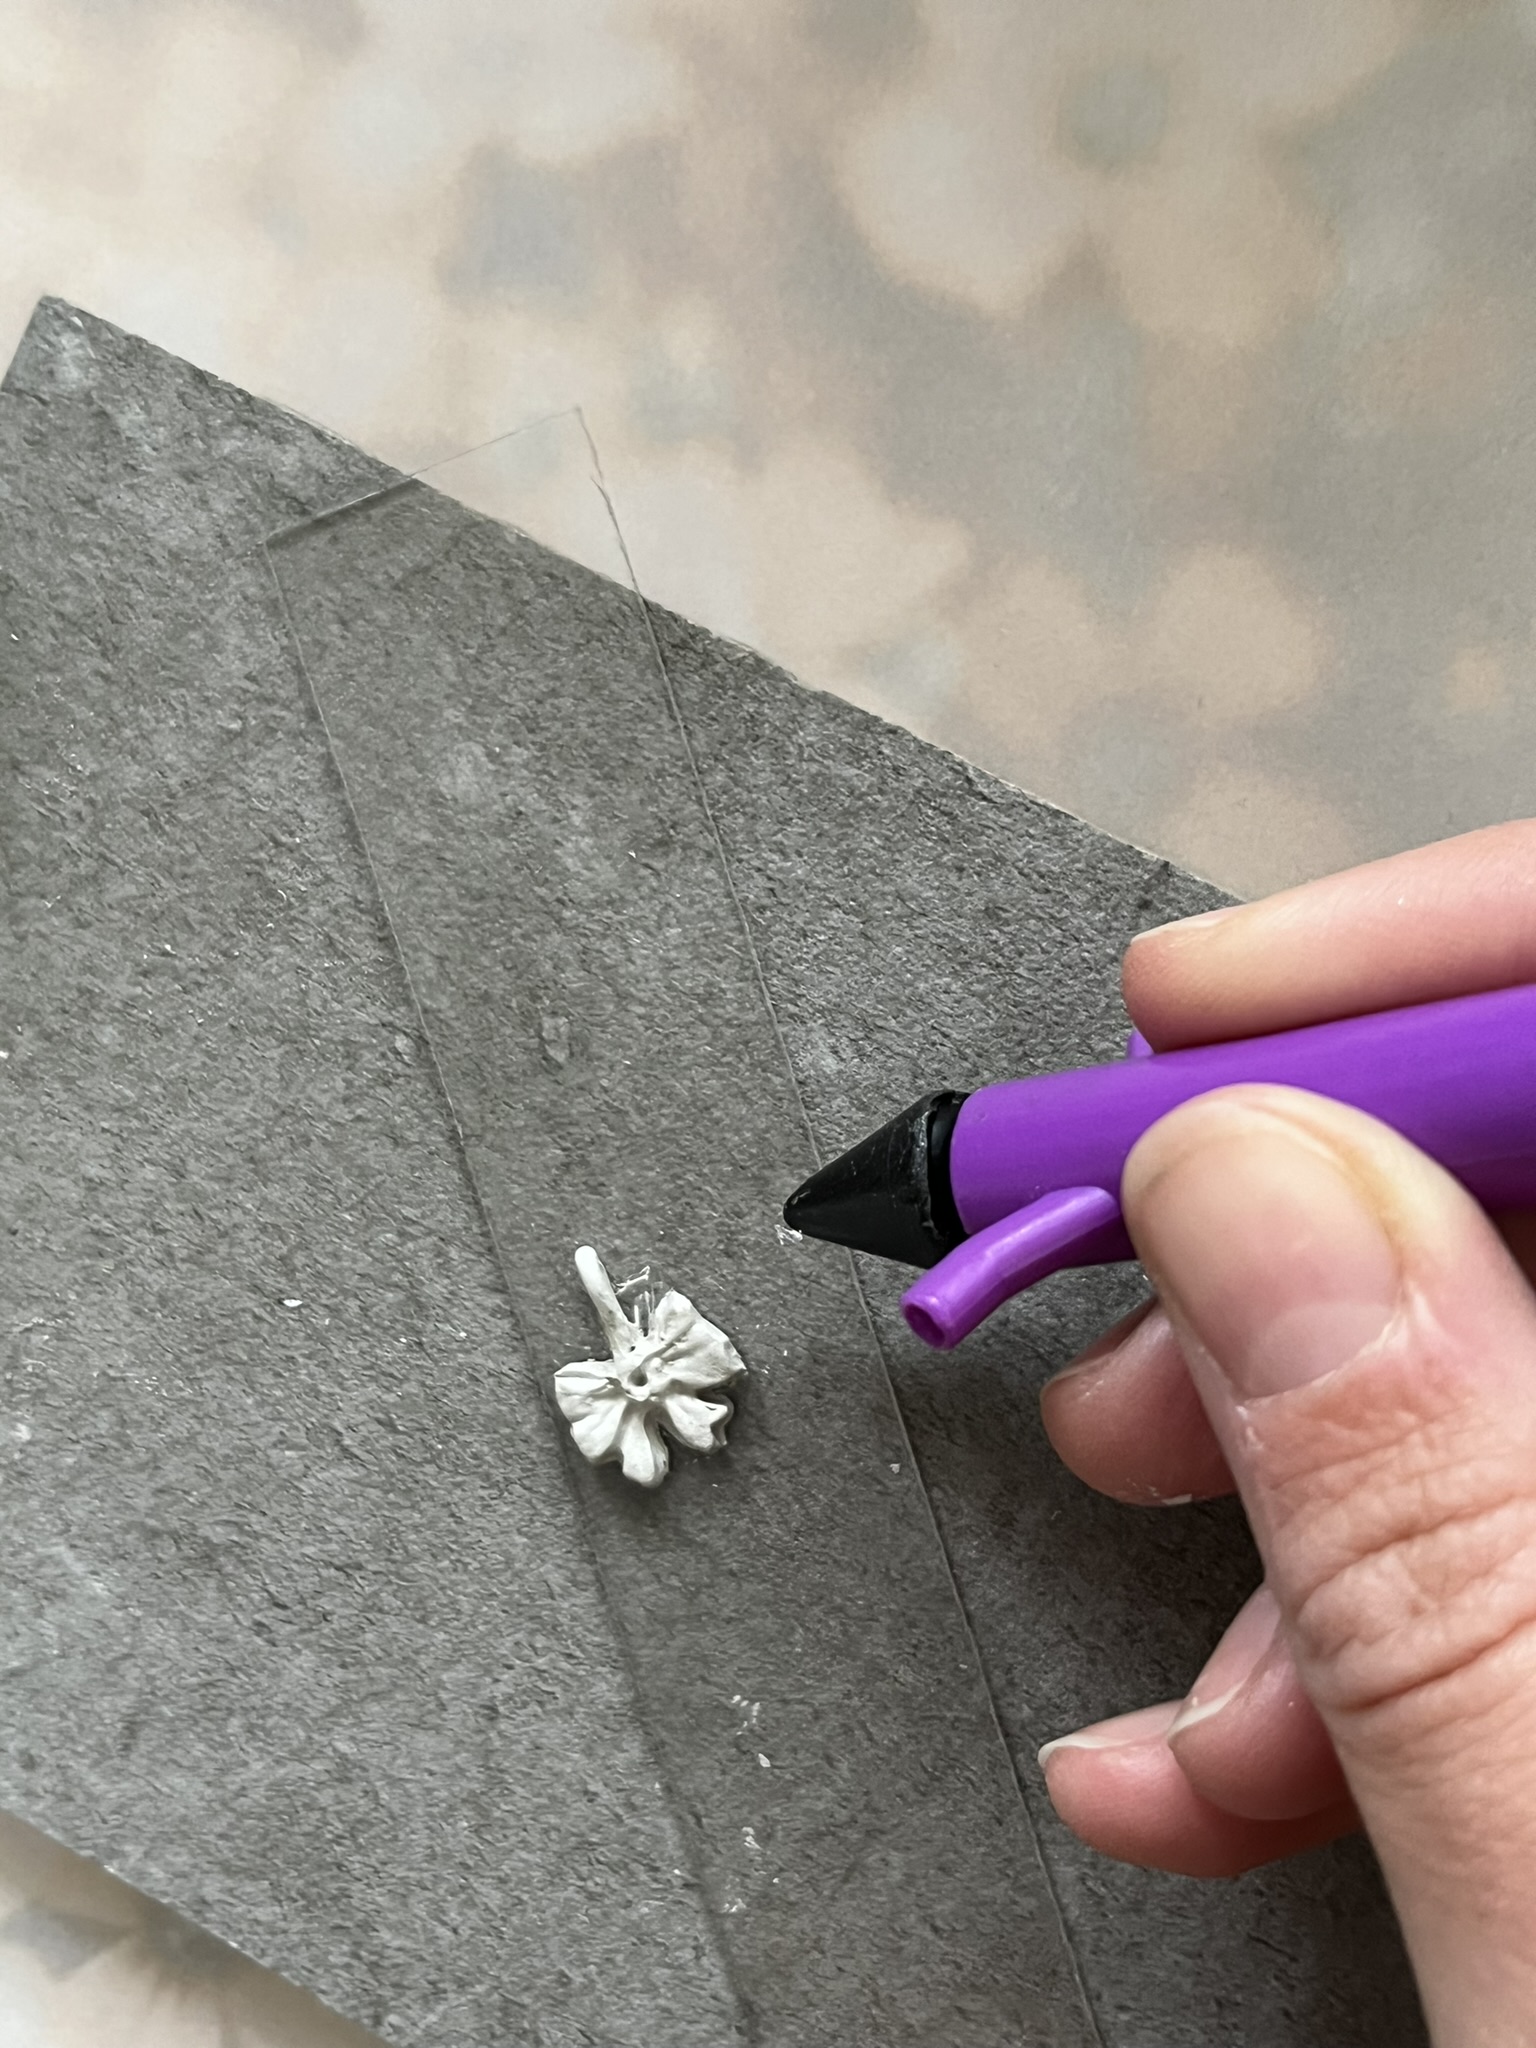
Step 6
Remove any excess clay and smooth any edges of the silver clay bow using a clay shaper tool or paint brush. Leave the silver bow to dry for 24 hours so it is thoroughly dried out.
Step 7
When completely, dry neaten any edges further using a scalpel or file.
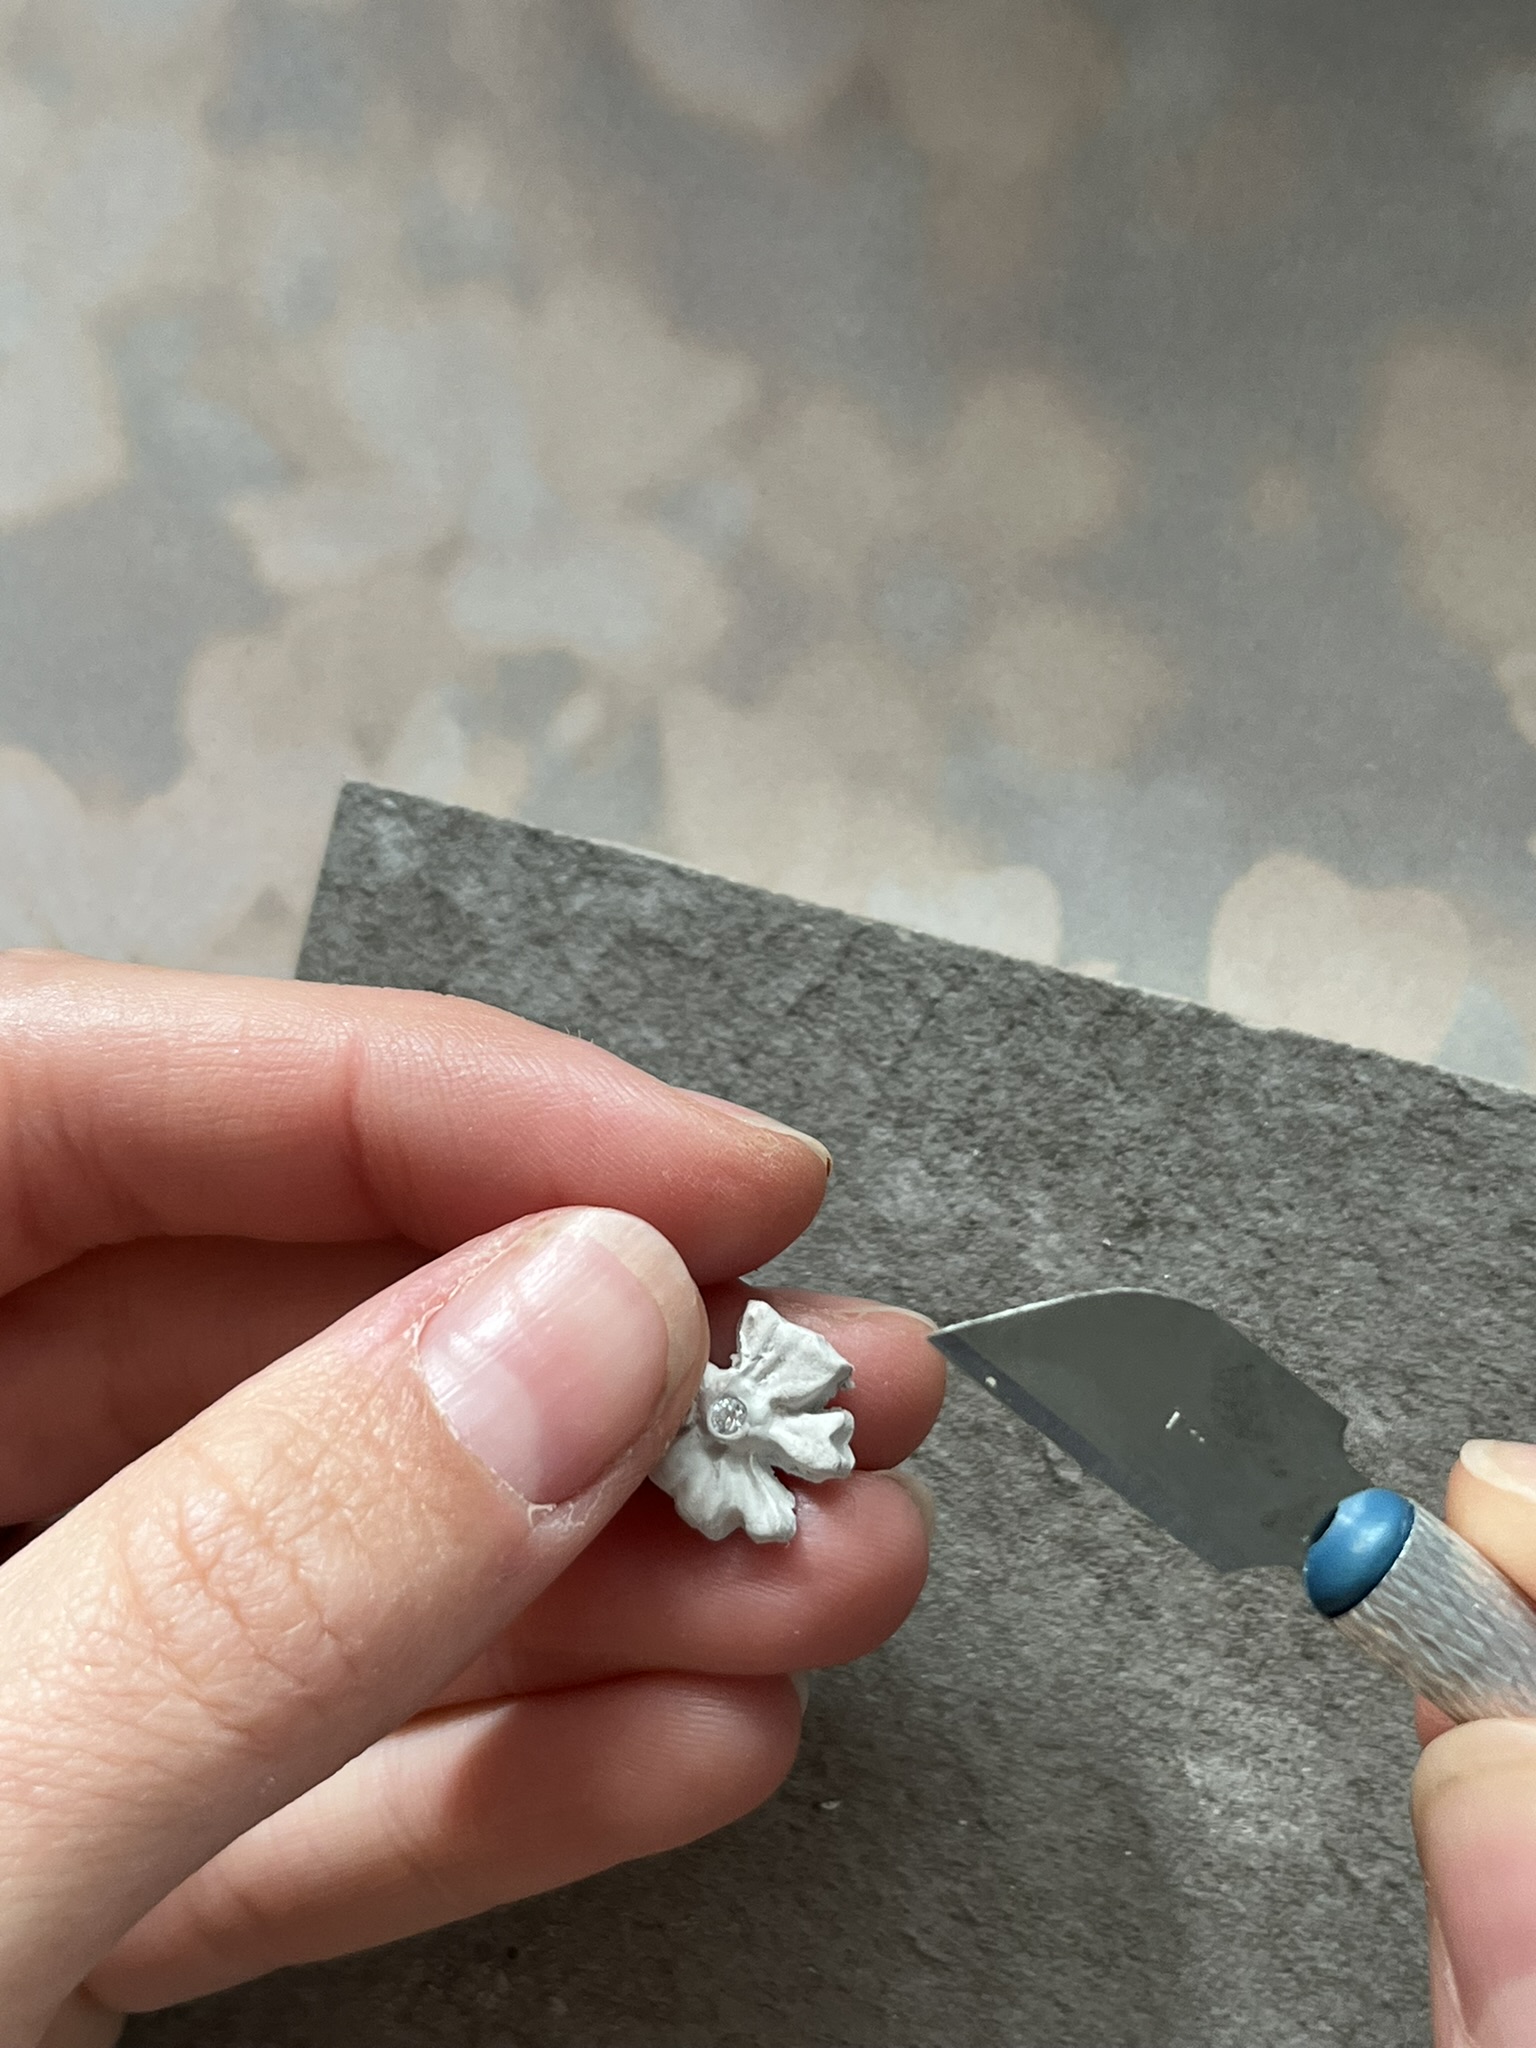
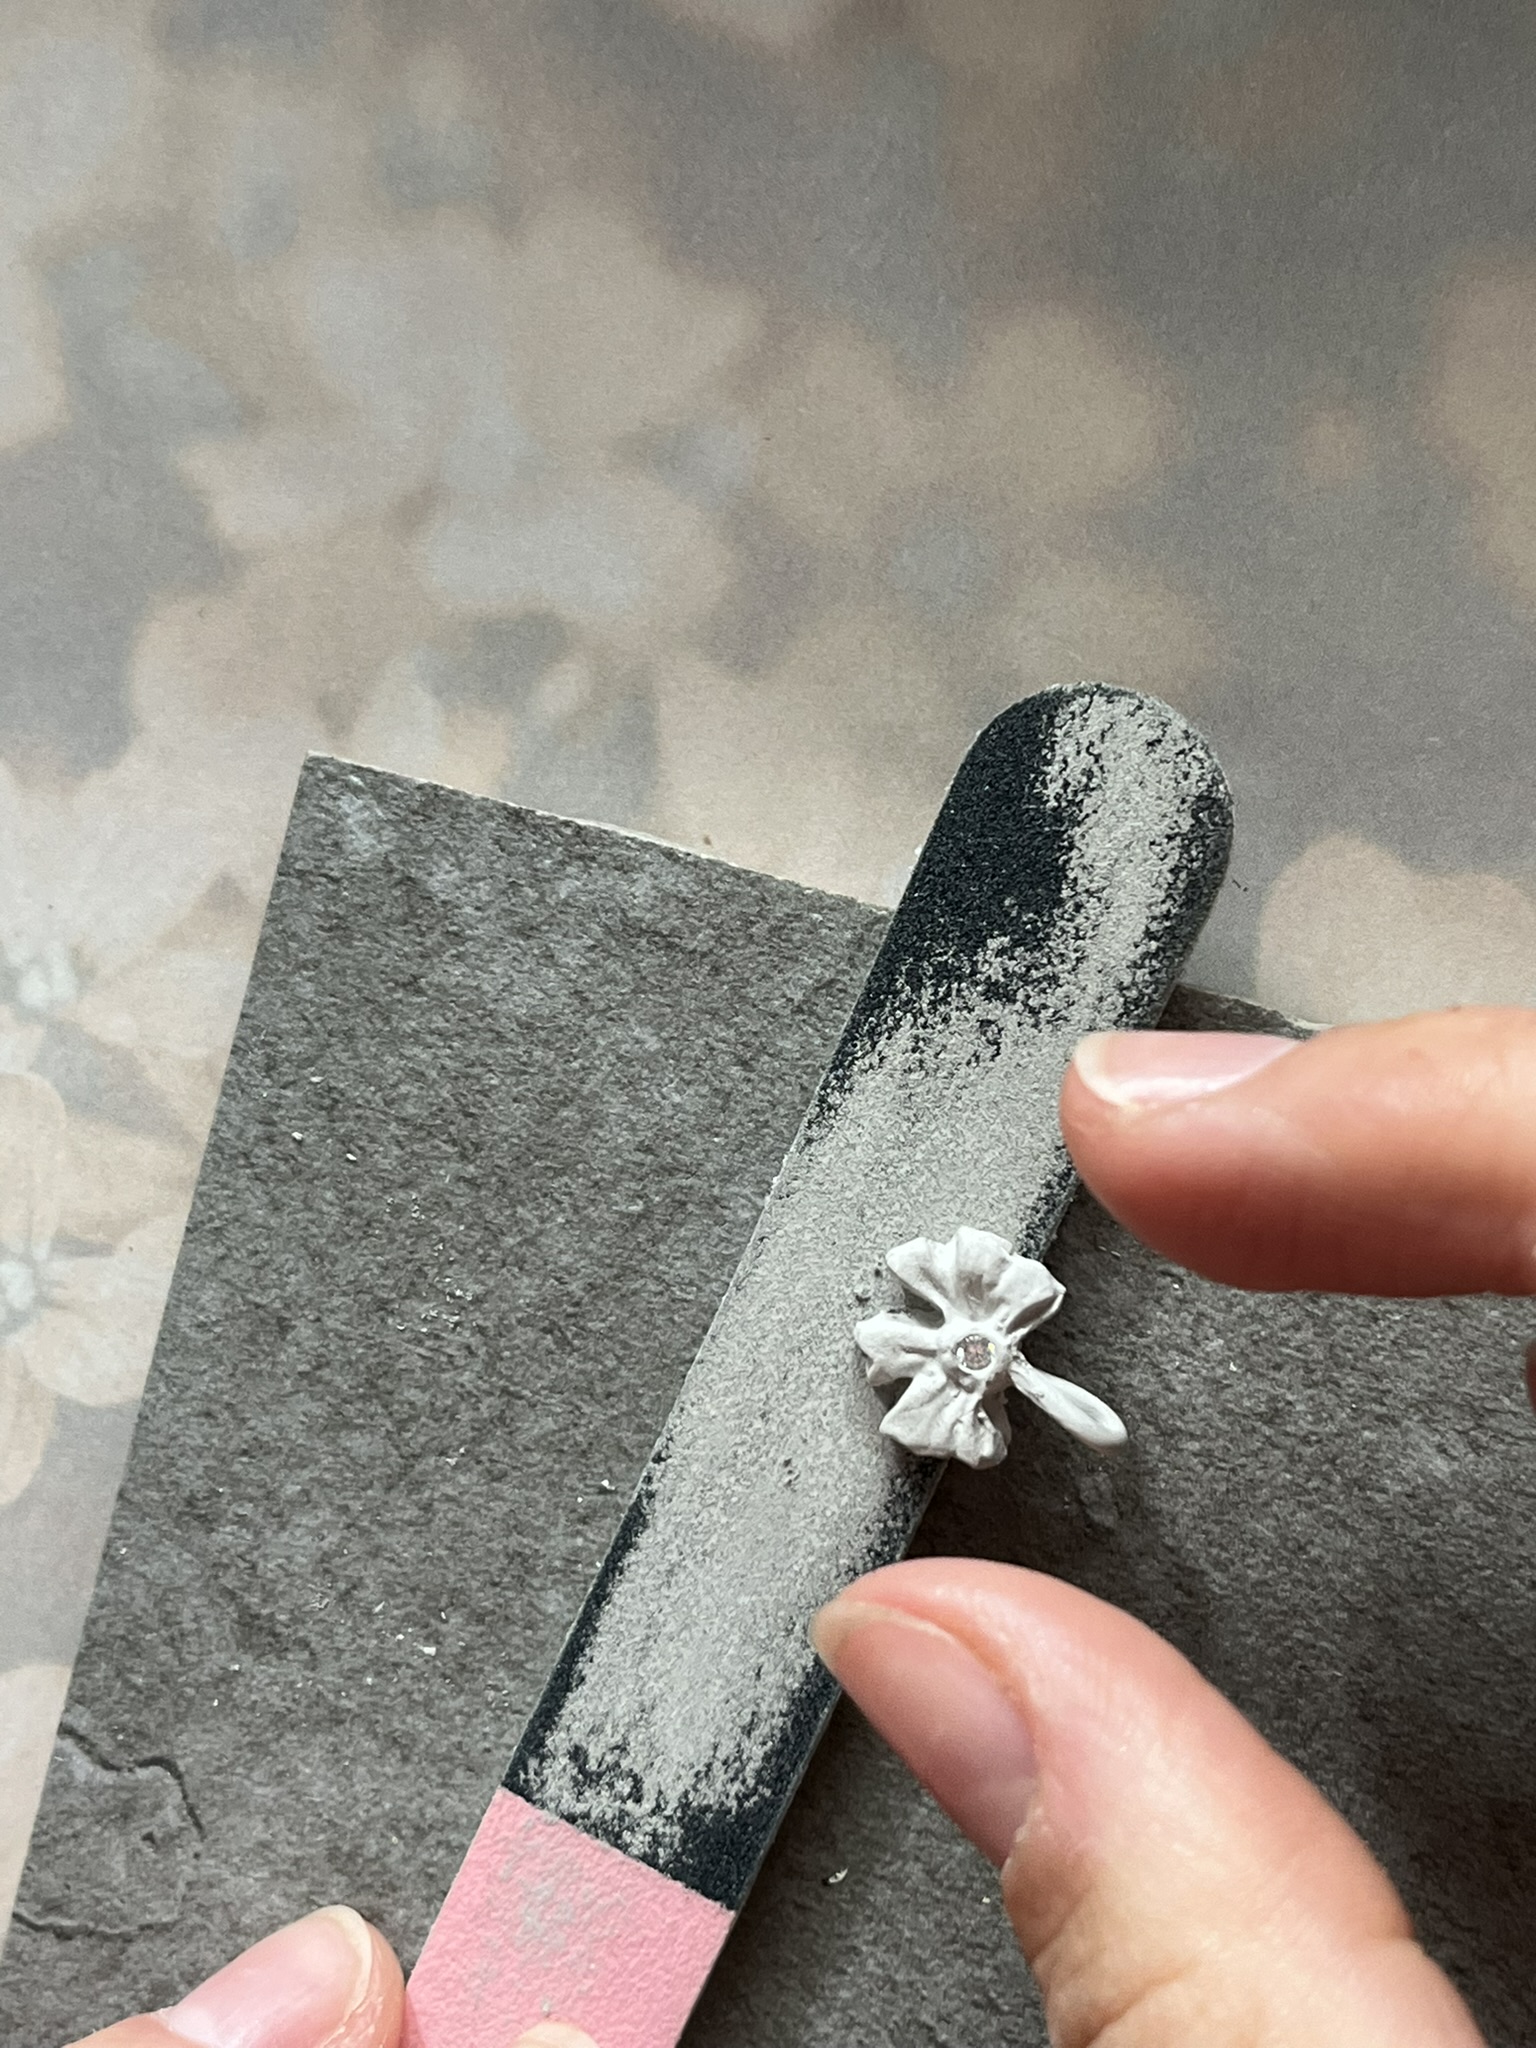
Step 8
Sand the back or sides of the silver clay using abrasive boards or paper. Remember to be gentle as the silver clay is now very brittle.
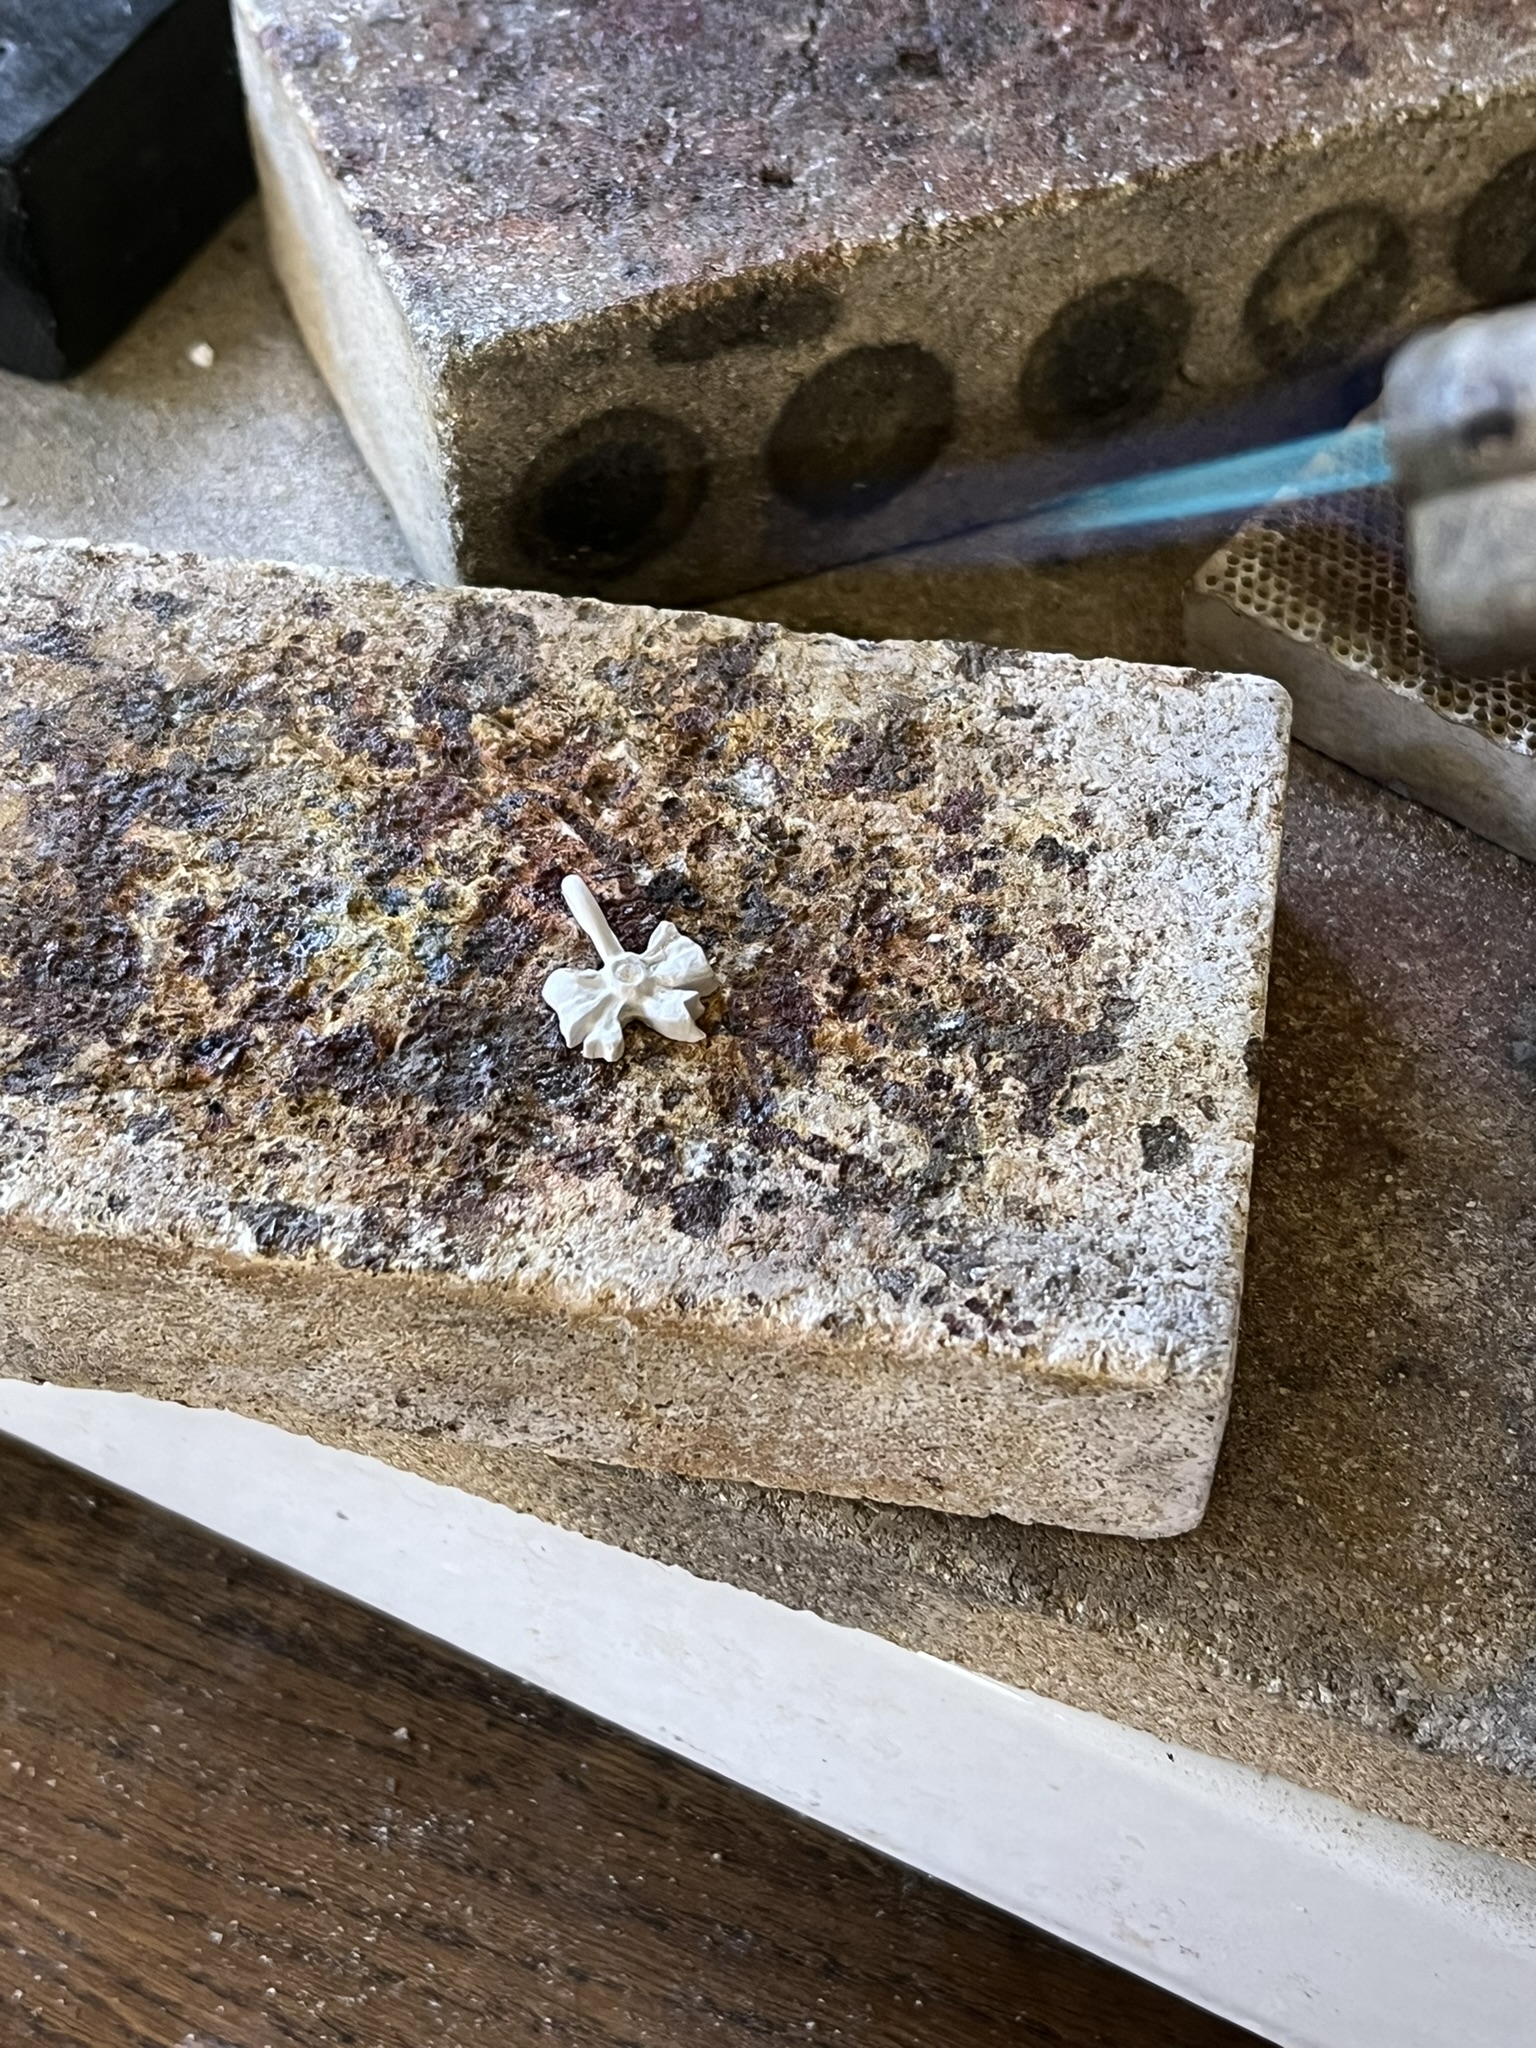
Step 9
Place the silver clay bow on a soldering block and heat using a blowtorch. Burn off the binder and then torch fire following the instructions included with the silver clay. Let the silver clay completely cool before handling.
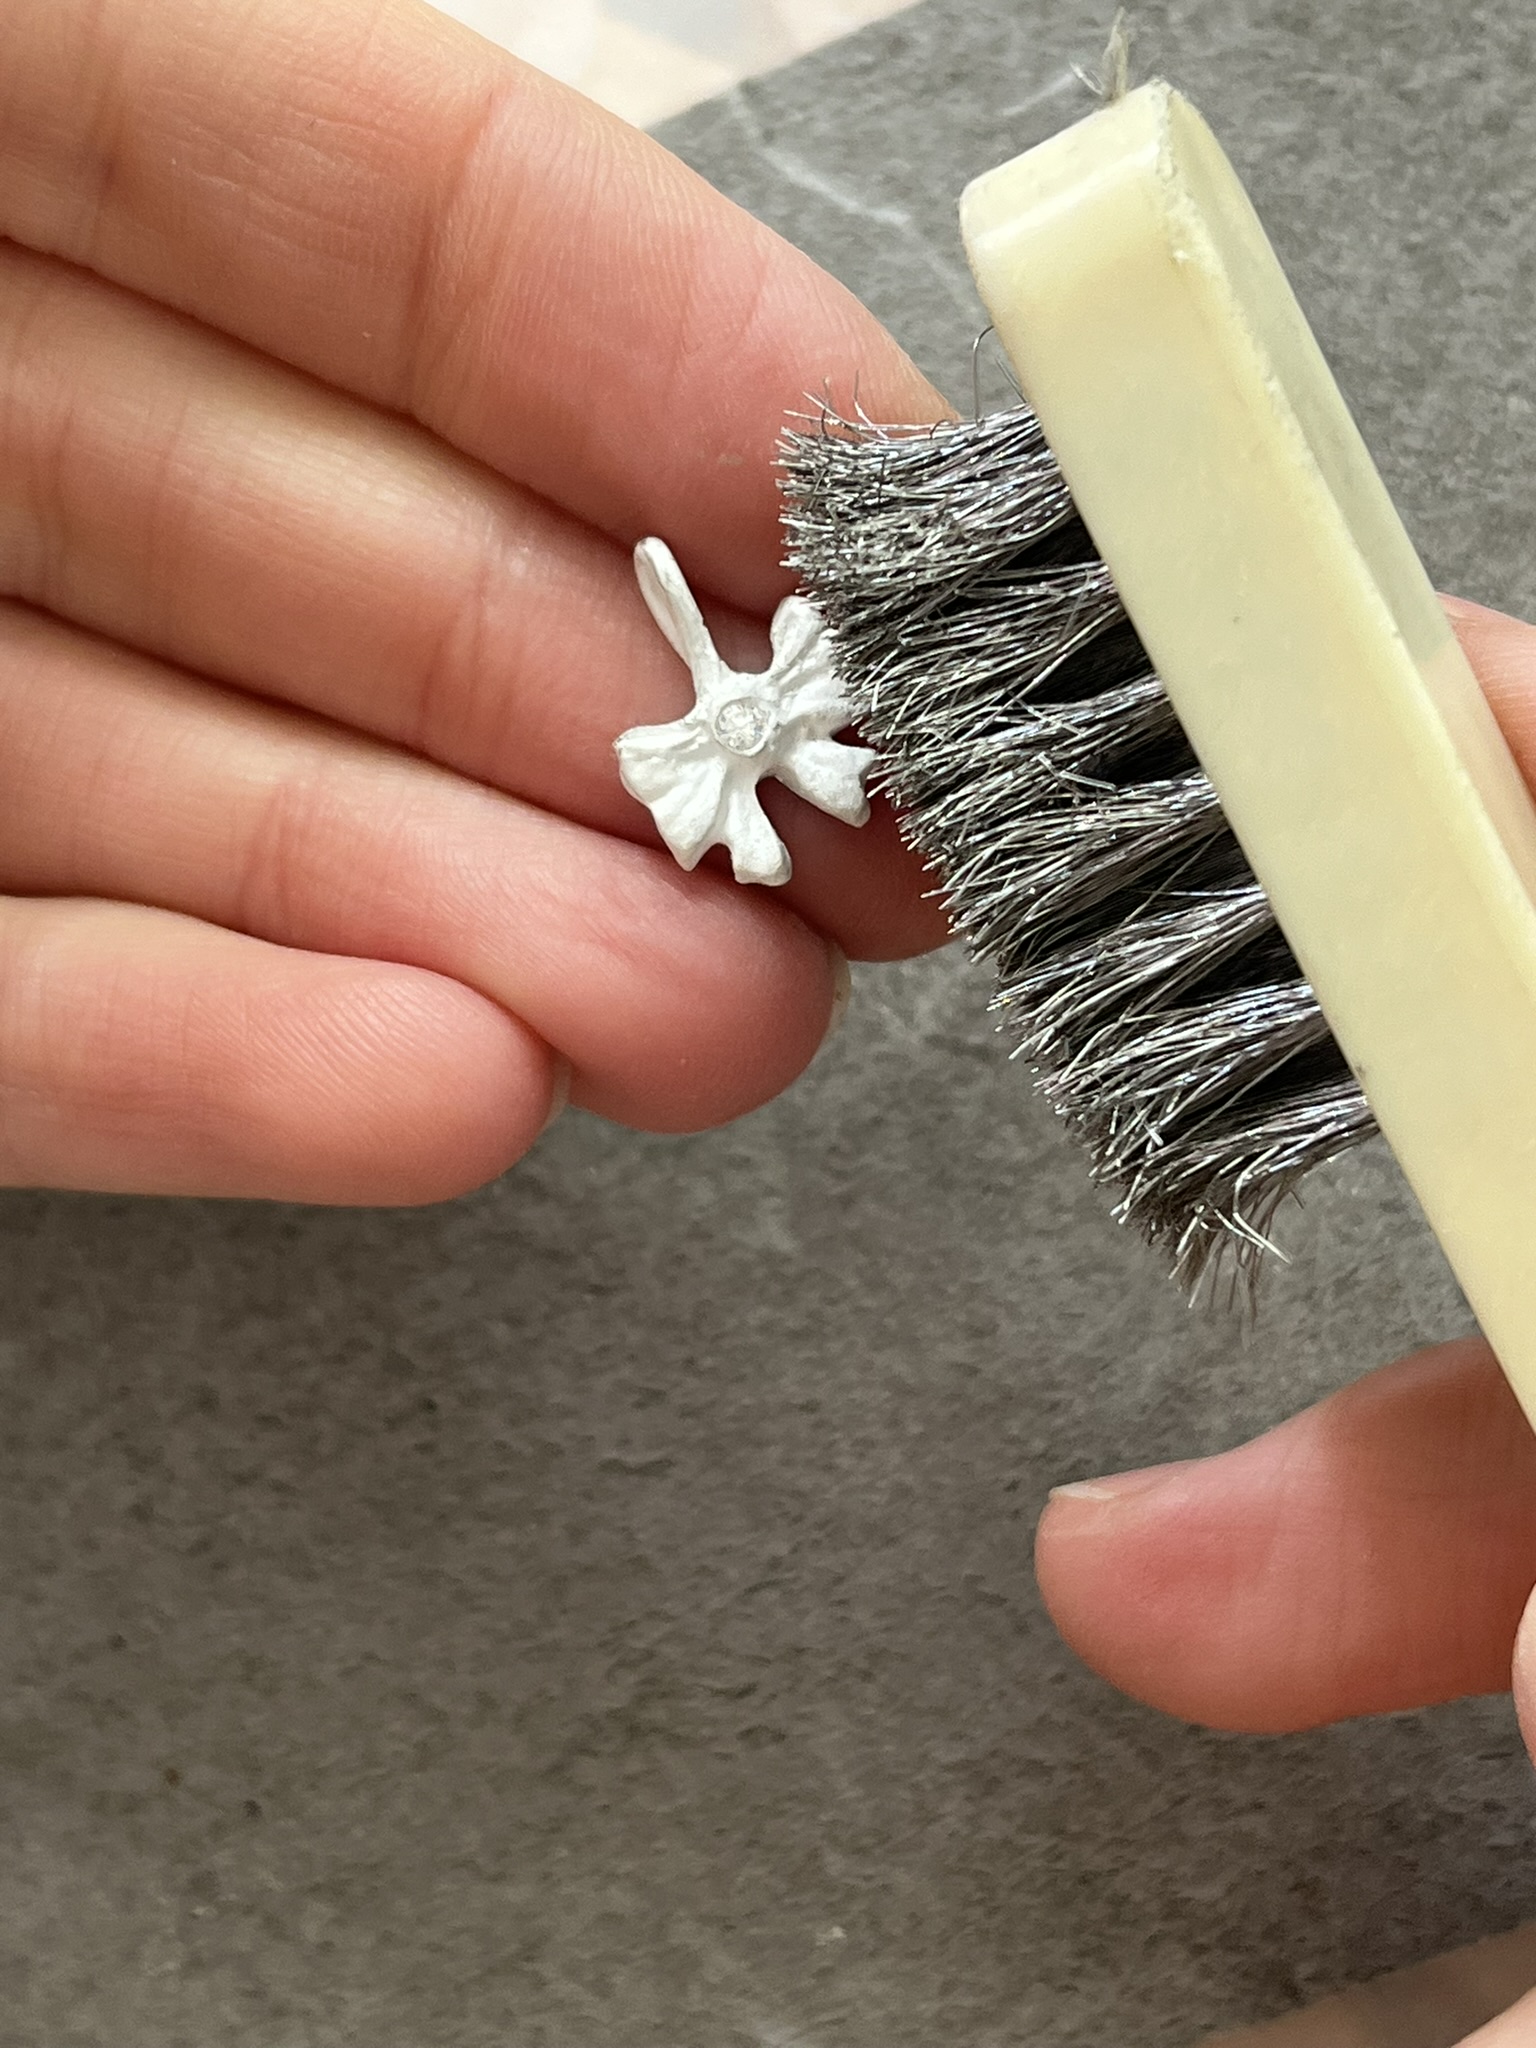
Step 10
When cool, use a metal brush to bring out the detail of the bow.
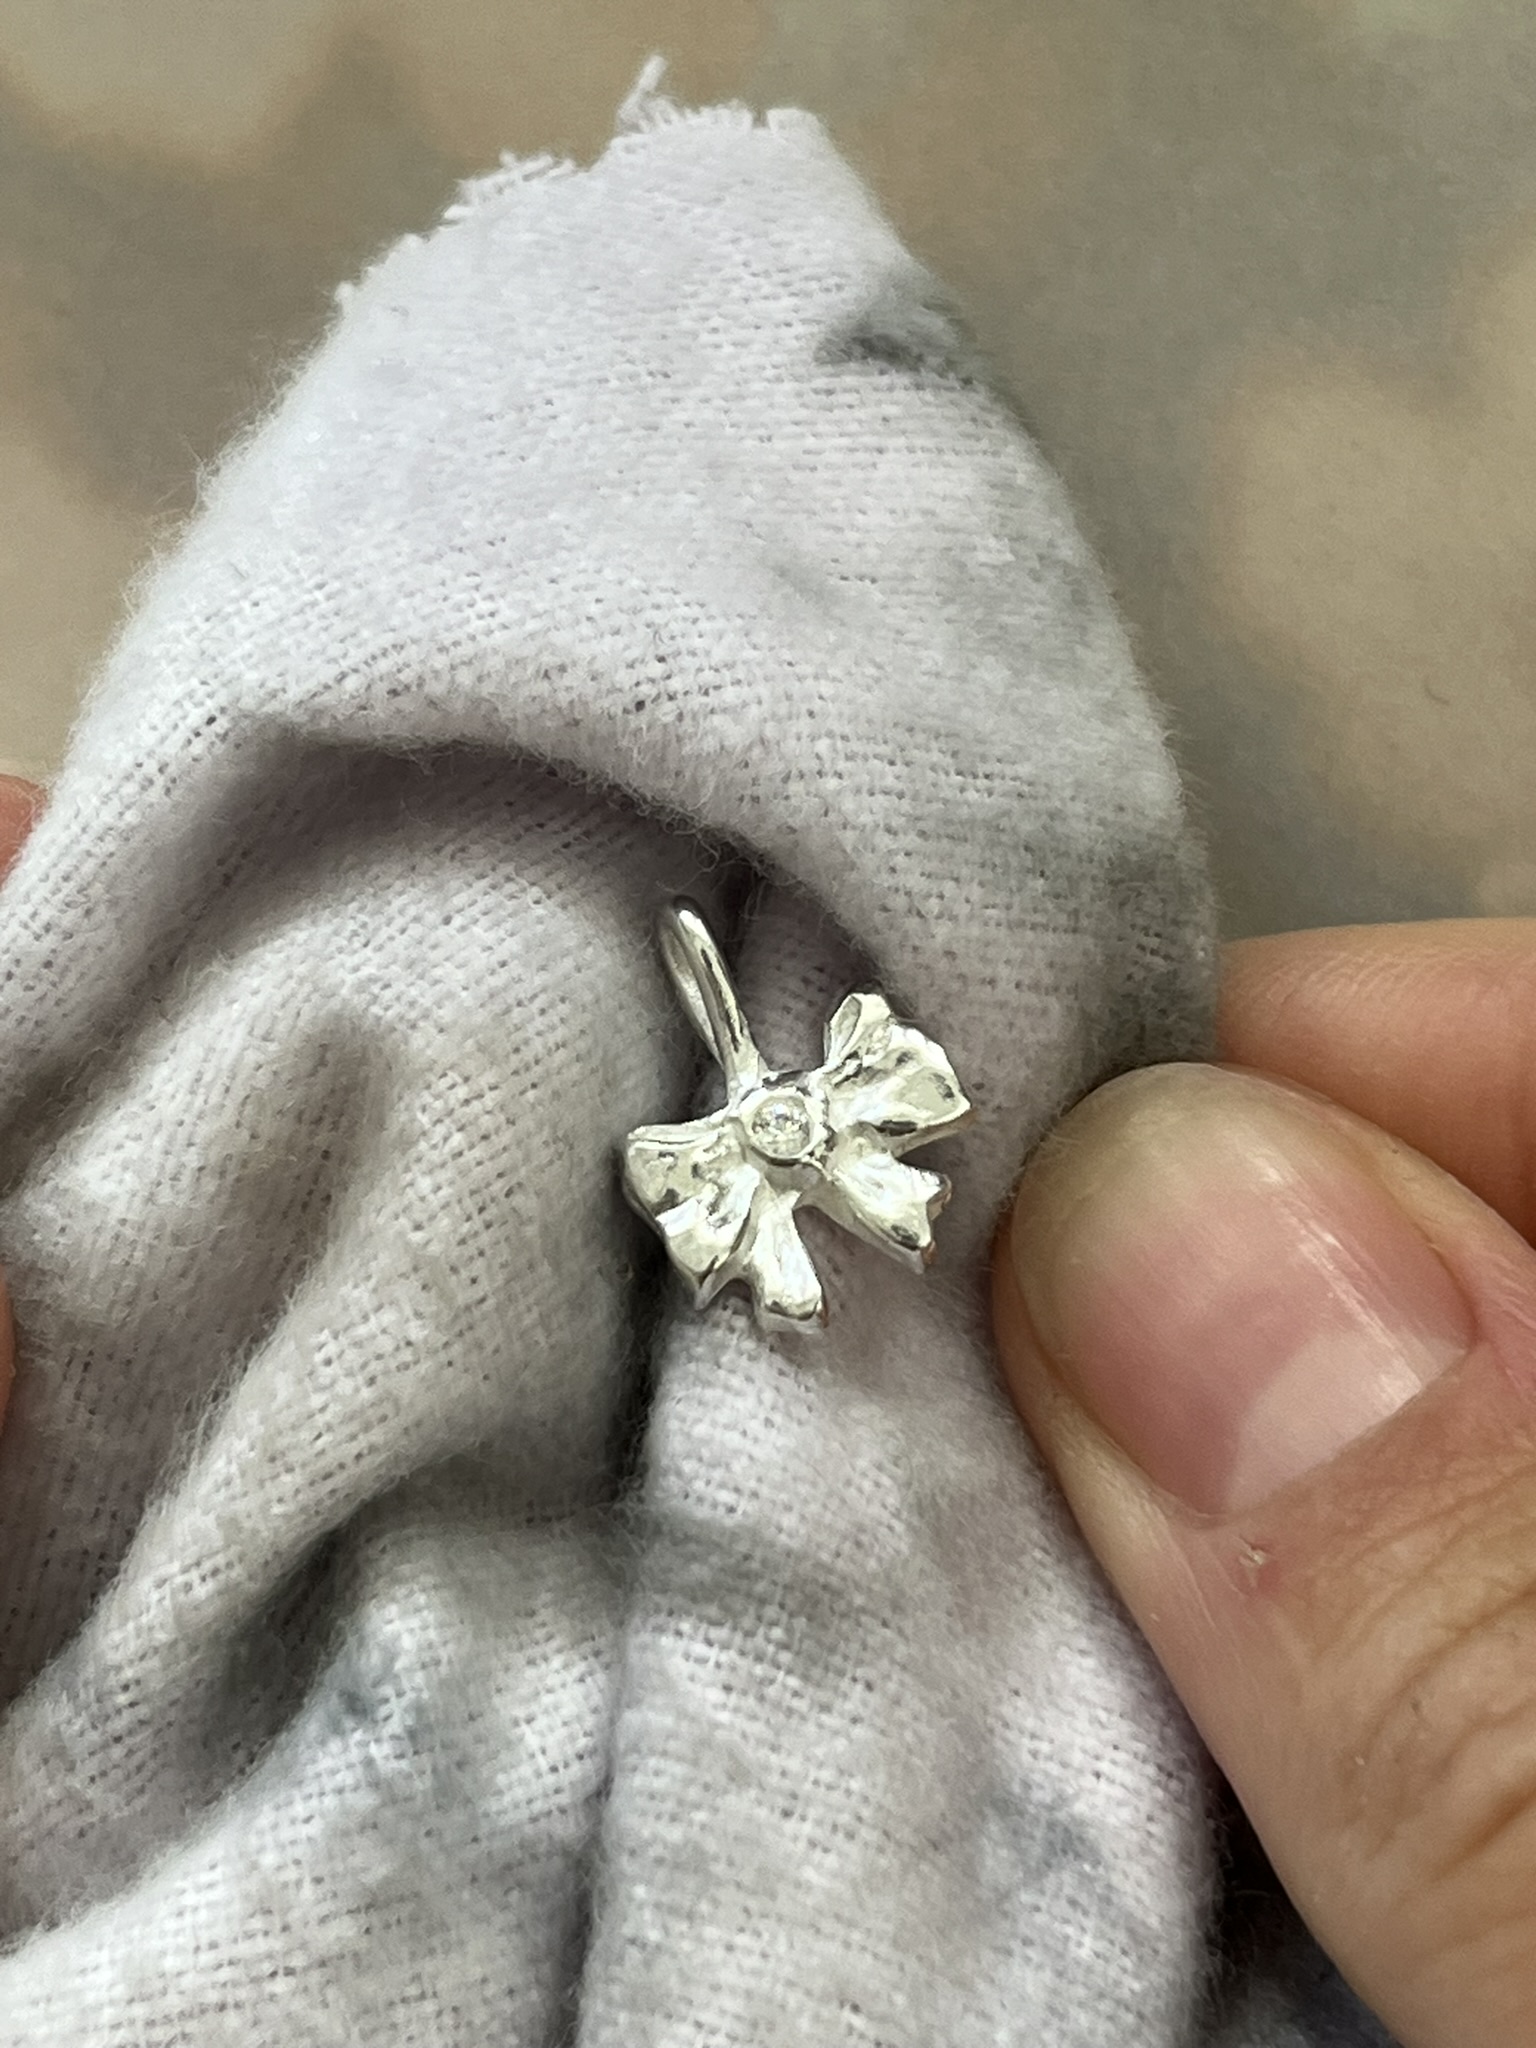
Step 11
Use a polishing cloth to add shine to the silver bow pendant.
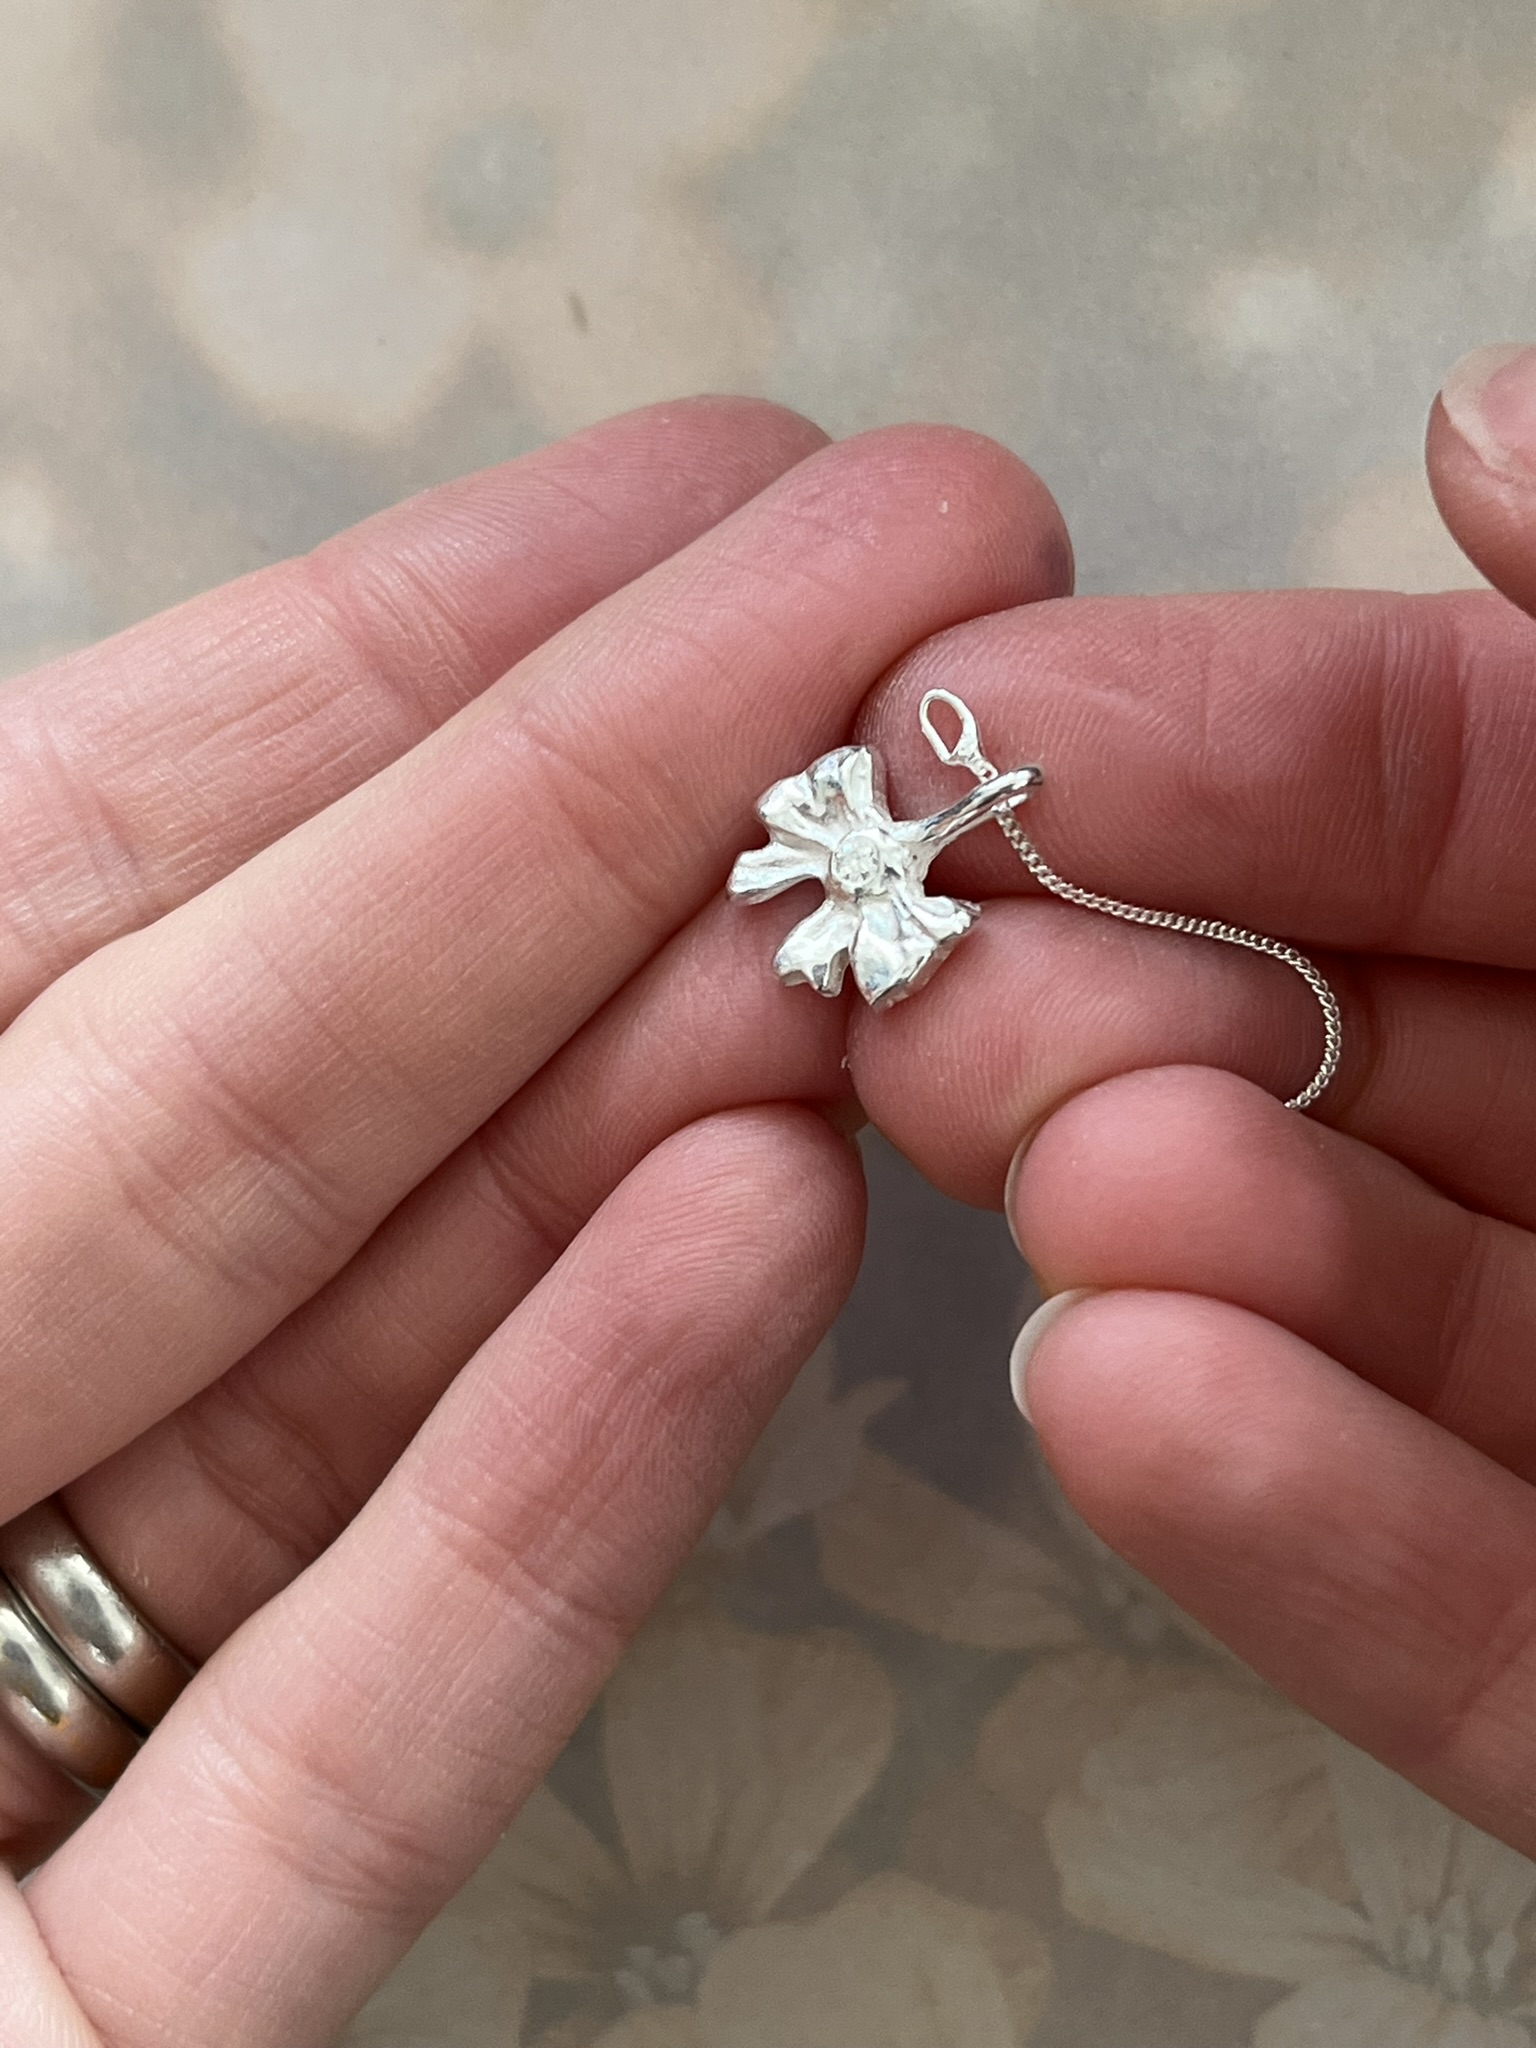
Step 12
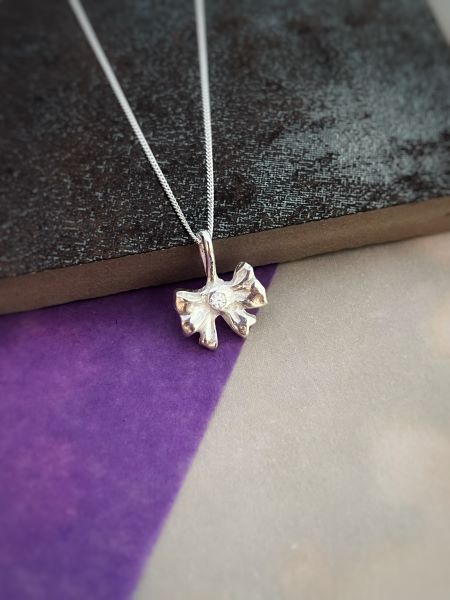
Finally, thread the silver chain through the loop at the top of the bow.
With silver clay, the design possibilities are endless. This is a fantastic project for jewellery makers of all skill level and a great way to get to grips with understanding how to mould silver clay and how to fire silver clay too.
Stock up on all of the tools you need, our silver clay range really does include everything from leading brands including Project X Clay and Art Clay Silver, and follow the step by step guide to bring your version of this silver clay pendant design to life.

Sian Brown
Sian has been hand making her award winning jewellery in the West Midlands for over 12 years. Sian spent 10 years in Birmingham’s historic Jewellery Quarter before relocating to a quiet Worcestershire village.