Thinking of making your own anticlastic ring?
Anticlastic rings are an excellent place for beginners to start out with their jewellery making hobby, or for professionals who are looking to take a new direction. Learn how to make an anticlastic ring with our easy guide – complete with a video tutorial and step-by-step instructions.
Anticlastic raising: what is it?
Anticlastic raising is a complex process of forming sheet metal with a hammer to create curves and coils, stretching the edges of the sheet metal more than the centre. The anticlastic technique can take years of training and definitely a lot more than we can cover here in one blog post! which is why here, we’re simply providing you with a basic overview of the anticlastic technique used in its simplest form; to make a basic ring. Forming the metal around a ring die with a forming hammer causes the sheet to curve around two axis – leaving you with a unique saddle-type shape.
You can achieve various different shapes and formations using the anticlastic raising technique, but why not start with learning how to make a simple silver ring? Discover the process below.
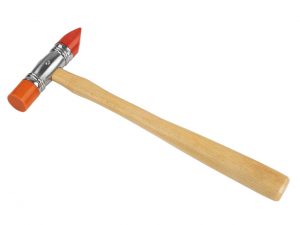 Anticlastic raising tools for ring making
- Sheet metal – the base for your anticlastic ring – we opted for silver.
- Disc cutters – an easy, fast way to cut out the shape of your ring, or you can do this by hand using a jeweller’s saw and file.
- Ring forming die set – this is what allows you to form a precise, smooth ring shape.
- Vice – to hold the ring forming die securly in place to avoid any breakages or wonky shapes.
- Forming hammer – allows you to easily bend and form your ring around the die.
Find everything you need to make anticlastic rings online at Cooksongold and discover a wide a range of jewellery making supplies.
How to make an anticlastic ring
Find out how to make a silver ring at home or in your studio below.
[iframe width=”560″ height=”315″ src=”https://www.youtube.com/embed/a98dAlyprck” ]
- Choose your disc cutter shape and size for your anticlastic ring – this will determine the size and shape of your jewellery piece.
If you’re doing this step by hand – use a stencil to outline your shape with a scriber, cut out the shape with your saw and then file and sand down the edges for a smooth finish.
- Using your disc cutter, place your metal firmly in the die, stamp it with a hammer and then remove the cut metal.
- Take your ring forming die set and set it up in your vice with the matching die parts facing tip to tip. Screw in the shoulder bolt and tighten until safely secured.
- HoLd the metal between your thumb and first finger and using your forming hammer, shape the ring around the die parts.
Top tip: As you hammer, move and reposition the strip of metal round the die to get a completely smooth, rounded shape for your anticlastic ring.
Some texturing ideas for anticlastic rings
Looking to add some additional texture to your anticlastic ring? Don’t be afraid to experiment with different techniques to create your desired finish. But before you get started, first practice on a piece of scrap metal so that you can get a feel of the design you would like your jewellery piece to be in. Some ideas we suggest are:
- Use a hammer and shaped stamps to create patterns and texture in the metal
- Use a riveting hammer to create a lined pattern
- Use a jobbing/ball pein hammer to form dents in the metal which gives off an indented bubble effect.
Top tip:Always add and create your texture before shaping and cutting your ring – you’ll find it much easier to control and it won’t disturb the shape of the piece. Simply outline the shape that you’re going for with a scriber, create the texture using any of the techniques mentioned above and then cut your ring out.
Hopefully you have found our guide useful and you’re now fully equipped to make your own anticlastic rings, using new and interesting textures to come up with bespoke designs. Why not have a go at trying out some other anticlastic jewellery designs, too?

Cooksongold