Easily create a personalised name necklace with our laser cutting service. This guide will help you design and assemble your custom piece through our online portal. Perfect for yourself or as a gift, our precise technology guarantees flawless results.
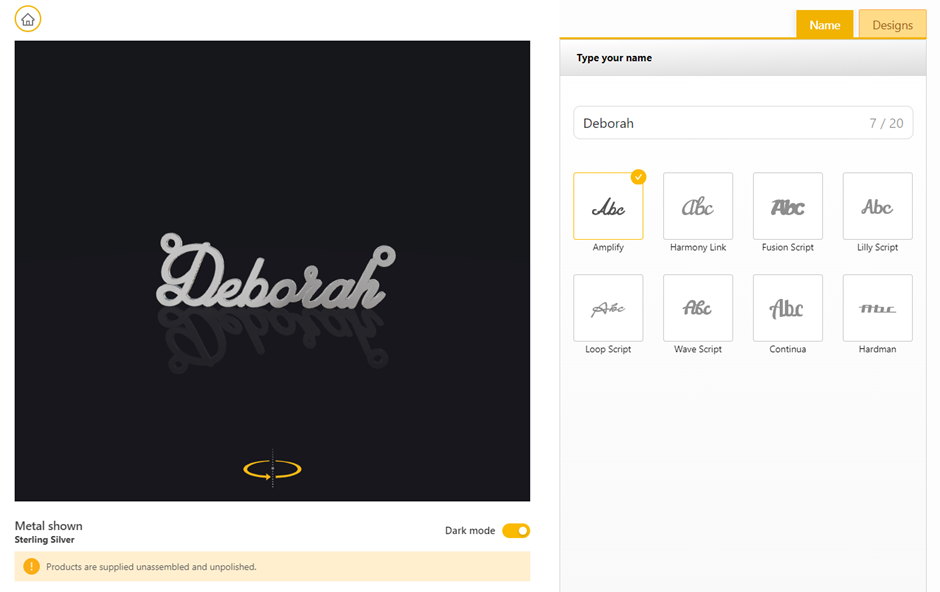
Step 1: Style
Enter the name or word you want laser cut and choose from eight unique fonts. A preview of your selection will appear on the left, showing how it will look. Once satisfied, click “Next” to continue.
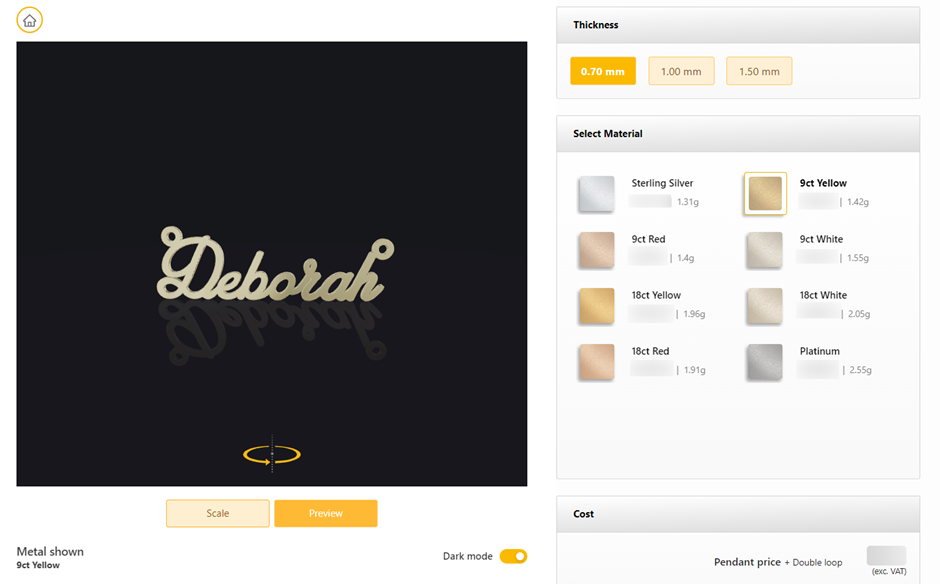
Step 2: Scaling & Material
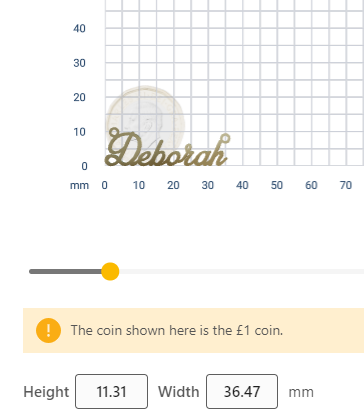
Select the material and thickness for your design: 0.7, 1 or 1.5mm and choose between eight precious metals, including 100% recycled sterling silver and gold alloys. The preview will update with your selection, showing the estimated price and weight. To adjust the size, click the “Scale” tab and use the slider. Note that precious metal prices fluctuate daily, so the final price may vary depending on when you place your order.
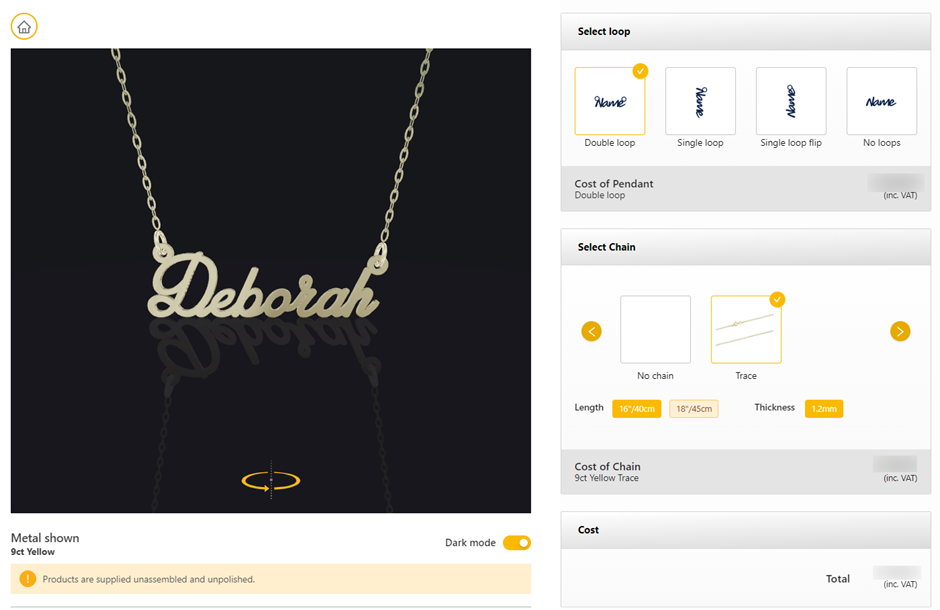
Step 3: Chain & Loops
You can add loops and a chain, both optional based on how you plan to use your piece and its orientation. Choose between double, single, single flip or no loops. You can also select the chain’s thickness and length. The available options depend on the metal and size of your piece. To make the name straight, select double loops and add a trace chain. Please note, products are supplied unassembled, unpolished and without jump rings.
Step 4: Confirmation
The final step is to confirm that you are happy with your order or if you want to make any final adjustments before adding it to your basket. Once purchased, all that is left to do is wait for your name necklace to be delivered for you to assemble and polish at home.
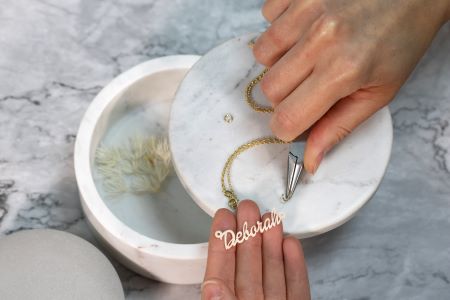
Top five tips for attaching chain and finishing your name necklace
- Use the right jump rings: Pick jump rings that match the chain’s thickness and secure the nameplate. Use flat-nose pliers to open them carefully.
- Solder for extra security: Solder the jump rings after attaching them to prevent the chain from coming loose.
- Ensure even chain placement: Attach the chain evenly on both sides of the nameplate for balance.
- Polish after assembly: Use a polishing cloth or buffing wheel to add shine and to remove fingerprints.
- Add a secure clasp: Use a sturdy clasp like a lobster clasp and attach it with strong, small jump rings.
To view our online portal click here or visit cooksongold.com/laser-cutting

Sian Brown
Sian has been hand making her award winning jewellery in the West Midlands for over 12 years. Sian spent 10 years in Birmingham’s historic Jewellery Quarter before relocating to a quiet Worcestershire village.