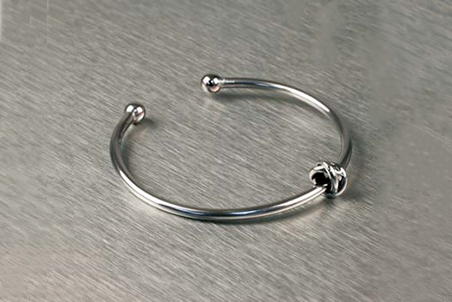
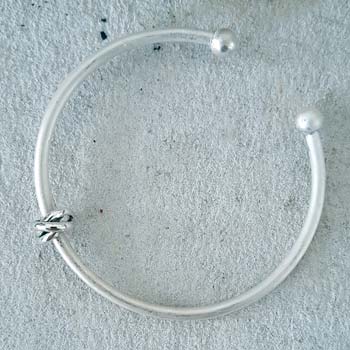
Create this beautiful Silver torque knot bangle, with our easy step by step tutorial.
Step 1: Measure the wire
Measure the wire to the required length. For this project I’ve used 7” length to make a 60mm diameter bangle.
Step 2: Prepare the wire
File the ends of the wire flat.
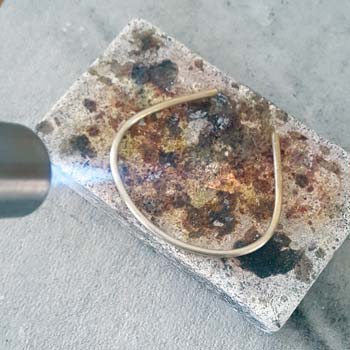
Step 3: Gently heat
Anneal the wire ready for forming.
Step 4: Quench & pickle
After annealing, quench the wire in water, then put it into the safety pickle until clean.
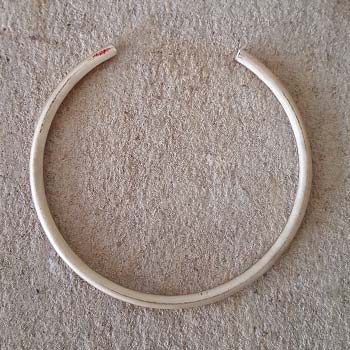
Step 5: Shape the wire
Using the bangle mandrel, raw hide mallet and nylon mallet, loosely shape the wire to your desired shape making sure there is a big enough gap at the top to add the beads (approximately 30mm). You may need to repeat step 3–5 a few times until the bangle has formed.
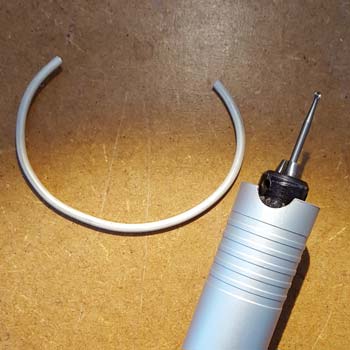
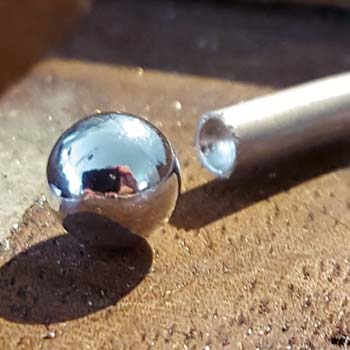
Step 6: Create a recess
Using the 3mm ball burr, create a recess for the 6mm Silver bead to sit into. Make sure you check the fit using the 6mm bead as you drill.
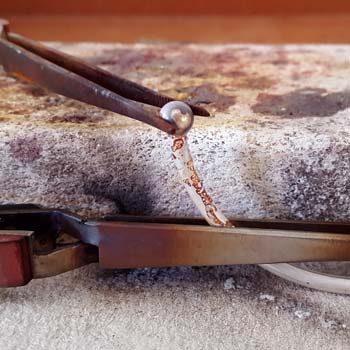
Step 7: Be patient
Once you’re happy with the seat of the bead, you can now solder. Use your bent reverse action tweezers to clamp the bangle upright with the straight reverse action tweezers holding the bead. This can be fiddly so patience is required! Flux the seat and join, then add your solder.
Step 8: Check your work
Once you’re happy with the join, quench and pickle.
Step 9: Add the bead
Slide on the decorative bead and prepare for soldering the second 6mm solid bead. Because the decorative bead has been oxidised, it is essential not to get this hot. This can be covered with heat protection paste (999 AAH) or a damp piece of tissue tightly wrapped around the bead.
Step 10: Bring the heat
Solder as in step 7.
Step 11: Pickle the joint
Once you’re happy with the join, quench and pickle but you must not pickle the decorative bead as this will remove the oxidisation. You can do this by creating your own jig or harness.
Step 12: Clean & tidy
If you’re happy with the solder join, clean up any excess solder using the 3 square needle file around the join. Make sure you follow the shape of the bead and wire.
Step 13: Check for nicks
Check over the wire and beads. There shouldn’t be any heavy nicks. However, if there are, these will need to be removed before polishing. This can be done with emery paper.
Step 14: Polish
Using your hard mop and tripoli, polish the bangle. Try to avoid polishing the decorative bead.
Step 15: Final polish
Once you’re happy with the initial polish, start your final polish using your soft mop and rouge.
Step 16: Finish
When polishing is complete, clean off the excess polishing compound with washing up liquid and a soft cloth, then dry and you’re finished.
We want to see what you have been making! Share your creations with us on social media, tagging in Cooksongold on Facebook, Twitter and Instagram.
Holly Cattel